Caulking is a regular task in home building and repair. It fills gaps and cavities, stops leaks, and enhances the look of joints and edges. A caulk gun is the cherry on the cake of this job. Using a caulk gun speeds up the work and makes it more accurate. It also enables you to get improved results and less waste. A correct caulk gun use will make sure that you have a neater and longer-lasting finish, no matter if you are renovating a bathroom or repairing a window.
What Is a Caulk Gun and Why Use One?
A caulk gun is a mechanical device that allows the user to push out a sealant or adhesive from a tube in a controlled manner so that an even bead can be deposited. The most common usage is in finishing work. For instance, sealing of joints around windows, baseboards, bathroom tiles, and tubs, are some places where a caulk gun is mostly used. In such works, precision is strictly required, and consequently, a caulk gun is the best option for long and vertical surfaces.
Choosing the Right Caulk: Silicone, Acrylic, Polyurethane & More
All caulk is not equal. Selecting the correct sealant requires consideration of surface, environment, and whether it has to be waterproof, paintable, or remain flexible after a period of time. Here is a quick summary:
Silicone Caulk
- Best for: Bathrooms, kitchens, glass, ceramic, metal, and other non-porous surfaces.
- Key Traits: Waterproof, extremely flexible, and durable. Not paintable.
- Pro Tip: Apply masking tape on both sides of the joint for a good line. Silicone is sticky and more difficult to clean up if it smears.
Acrylic Latex Caulk (Painter’s Caulk)
- Best for: Interior trim, baseboards, drywall, and wood.
- Key Traits: Paintable, easy to blend, and cleans with water. Less flexible and not as durable as silicone.
- Pro Tip: Do not overwork the bead. This kind skins over quickly. Paint over it when it dries (usually 30 minutes to a few hours).
Polyurethane Caulk
- Best for: Exterior applications such as siding, roofs, foundations, and expansion joints.
- Key Traits: Very tough, flexible, weather- and UV-resistant. Paintable. Clean-up requires solvent.
- Pro Tip: Use in warm, dry weather, and leave to cure for plenty of time, typically 24 to 48 hours.
Hybrid or Specialized Caulks
- They might blend silicone with acrylic or provide special benefits such as mildew resistance or extreme hold.
- Pro Tip: Check the manufacturer label for compatibility with your project surface.
Caulk Gun Types: Rotary, Ratchet, and Drip-Free Explained
The caulk gun that you select has a significant effect on how accurate and clean your application will be. Here are the main types and how they differ:
Ratchet Rod Caulk Guns
- How It Works: Uses a toothed rod to advance the plunger forward in click-motion.
- الايجابيات: Inexpensive and easily found.
- سلبيات: Less precise control and tends to produce drips after releasing the trigger.
- Best For: One-time or occasional DIY applications.
Smooth Rod (Drip-Free) Guns
- How It Works: Using a frictionless plunger with immediate pressure release.
- الايجابيات: Mess-free bead control, less mess, cutting off of flow when trigger is released.
- سلبيات: A bit pricier than ratchet style.
- Best For: Homeowners and heavy users looking for clean results.
Rotary or Revolving Frame Guns
- How It Works: Barrel rotates for the user to keep consistent bead direction around corners.
- الايجابيات: Excellent for curved or angled use.
- سلبيات: Minor learning curve. Not drip-free all the time unless it is paired with smooth rod design.
- Best For: Pros and serious DIYer working around corners and close angles.
Powered Caulk Guns (Battery or Pneumatic)
- How It Works: Uses battery or air pressure to provide constant bead flow.
- الايجابيات: Smooth to use, maintains a steady flow rate, perfect for big jobs.
- سلبيات: Expensive, not worth it for small household jobs.
- Best For: Professionals or individuals who do high-output caulking.

How to Set Up a Caulk Gun
Inspect your caulk gun first and foremost. There should be no dried caulk in the nozzle or casing, and the plunger rod should slide without any resistance. If your gun is clogged or broken down, you will get a poor performance, and a great amount of caulk will end up on the work surface.
Next, you can prepare the caulk tube:
- With a utility knife trim the nozzle at a 45-degree slope. The lower you go the larger the bead will be.
- If an adhesive seal is set in the nozzle, use the seal punch provided or a long nail/metal strip to puncture it.
- Squeeze some caulk out of the tube to check if it is open and flow is possible.
Make sure you have a rag close by to clean the drips. This will lessen your cleanup later on and assure that the area remains clean and professional-looking.
How to Load a Caulk Gun (Step-by-Step)
Correct loading provides a steady flow and low product waste:
- Push back the release latch at the rear of the gun to pull the plunger rod back.
- Place the caulk tube into the back cradle of the gun, facing the nozzle out the front.
- Move the plunger to the front until it reaches the base of the tube.
- Gently squeeze the trigger to set the tension. You will feel slight resistance.
If the caulk fails to come out when you squeeze, make sure the foil seal is pierced, and the plunger is in.
How to Pierce the Inner Foil Seal
Piercing the inner foil seal is necessary. A lot of users ignore this step, then wonder why their caulk refuses to dispense.
- Look for an internal puncture rod, usually mounted to the side of the gun. Insert it into the nozzle and press hard until you hear or feel the seal shatter.
- If there is no rod, use a nail or other long object to puncture it by hand.
Without shattering this seal, the plunger cannot force the material onward. This is a typical cause of the problem of a “caulk gun not pushing.”
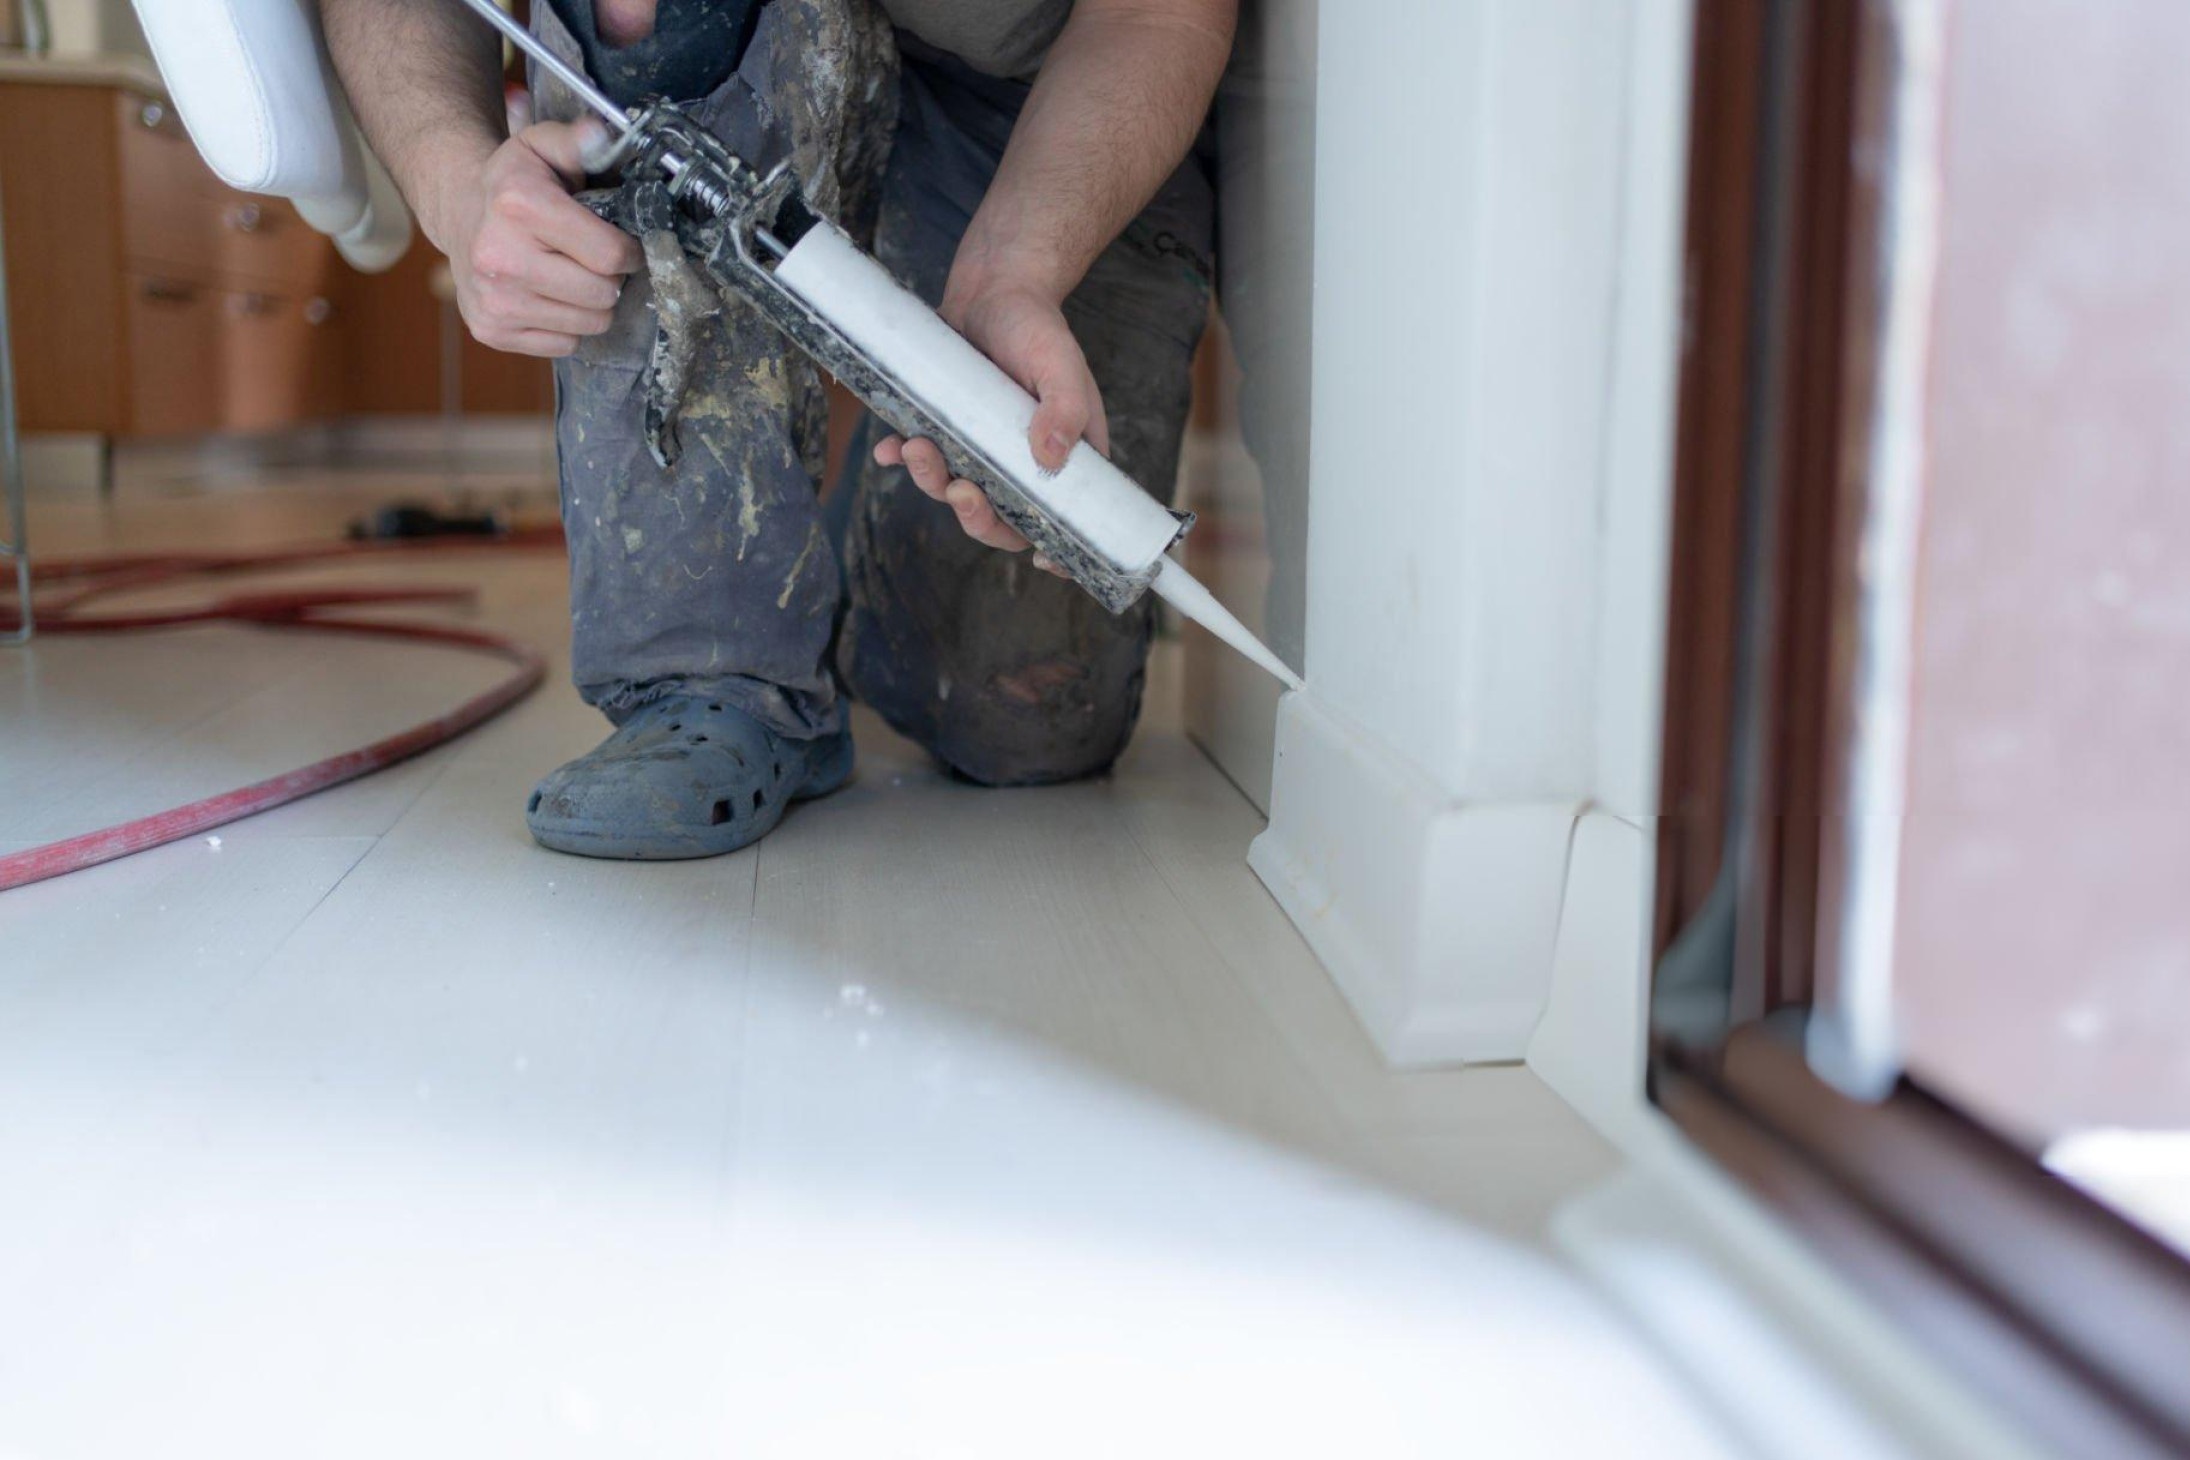
How to Use a Caulk Gun for Smooth Application
When the gun is loaded and the seal is broken, you’re in business. For the results:
- Hold the gun on a 45-degree angle.
- Trigger the gun gently to initiate flow.
- Push the gun steadily along the seam and apply even trigger pressure.
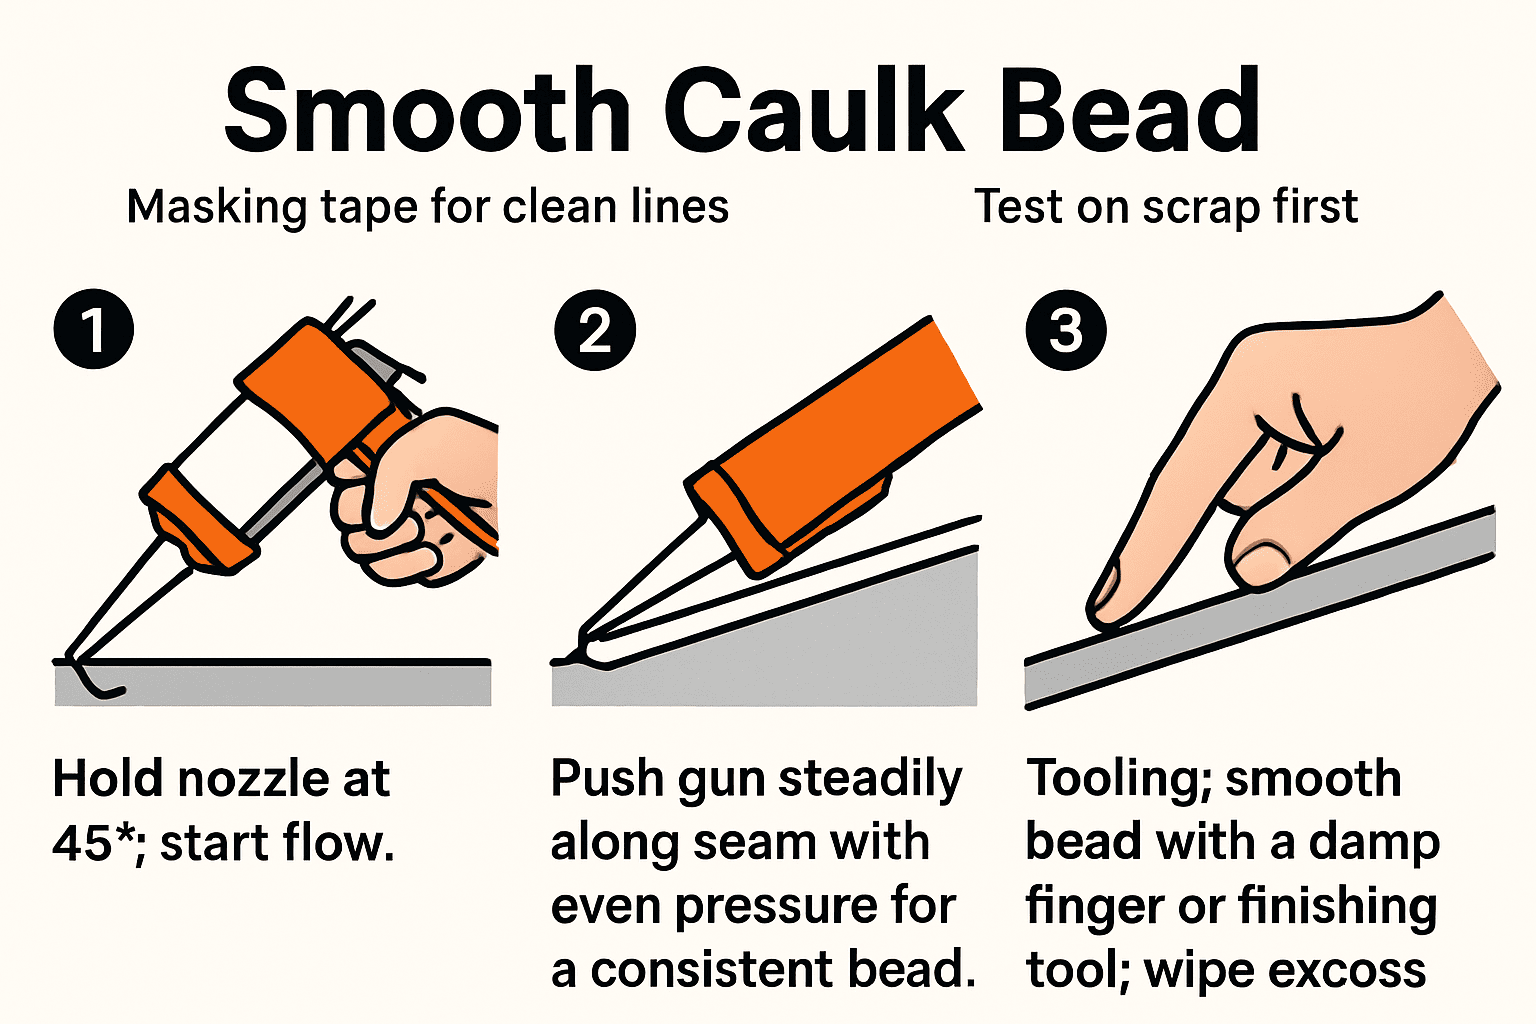
This produces a smooth and consistent bead. For tight corners or small gaps, use a narrower bead and move more slowly. Adjust speed and pressure based on the surface and caulk behavior.
It helps to practice on a test surface to avoid issues like air bubbles or uneven lines before starting your main project.
Application Techniques by Project Type: Bathroom, Windows, and More
Every caulking project presents its own challenges. Adjusting your method to the job will help you get a cleaner and more durable finish.
Bathrooms (Showers, Tubs, Sinks)
- Recommended Caulk: 100% silicone or mildew-resistant hybrid.
- Surface Tips: Wipe with rubbing alcohol. Dry thoroughly to avoid the growth of mold under the caulk.
- Pro Tip: Waterproof the tub with water prior to caulking. This loads the tub down and keeps the seal from cracking when it is eventually used.
Exterior Windows and Doors
- Recommended Caulk: Polyurethane or paintable exterior-grade silicone.
- Surface Tips: Remove old caulk, clean thoroughly, and thoroughly dry. Use backer rod for gaps over ¼ inch.
- Pro Tip: Do not caulk under extremely cold or wet conditions. Caulk on dry days, preferably over 40°F (5°C).
Interior Trim and Baseboards
- Recommended Caulk: Latex acrylic or latex-silicone combination.
- Surface Tips: Dust and paint scraps should be removed before application.
- Pro Tip: Use a thin bead and then pass a damp finger or tool over it to smooth. Allow to dry completely before painting.
Concrete, Brick, or Masonry
- Recommended Caulk: Polyurethane or specialty masonry sealant.
- Surface Tips: Clean joint using a wire brush to remove dust and debris.
- Pro Tip: For deep cracks, fill with foam backer rod before caulking to make sure of bonding.
How to Smooth and Finish the Caulk Bead
Once the caulking has been applied, it should be finished off and made to look clean and blend into the joint. The common debate is whether to use a tool or your finger. Once the caulking has been applied, it should be finished off and made to look clean and blend into the joint. The common debate is whether to use a tool or your finger.
- Caulk finishing tools offer precision, especially on straight edges.
- Your finger (gloved or damp) provides flexibility and control, which many pros prefer.
If you want to make the caulking smooth with your finger, make it a little wet (some people use soap water), and then gently move it along the bead. Besides forming the caulk, this also allows it to be placed deeper in the space, better sealing your gap. Remove the excess caulk and wipe your finger or tool often so they do not leave streaks.
How to Remove the Caulk Tube and Store the Gun
After you are finished with your work:
- Use the release tab or lever at the back of the gun to release the pressure. This stops any further caulk from being automatically dispensed.
- Pull the plunger back fully.
- Remove the tube by lifting it out of the cradle. Hold it upright to avoid drips.
- Use a damp cloth to wipe the nozzle and gun for any leftover caulk.
Knowing the proper way to release and remove the tube will not only help keep your tool in good condition but also ready for the next time.
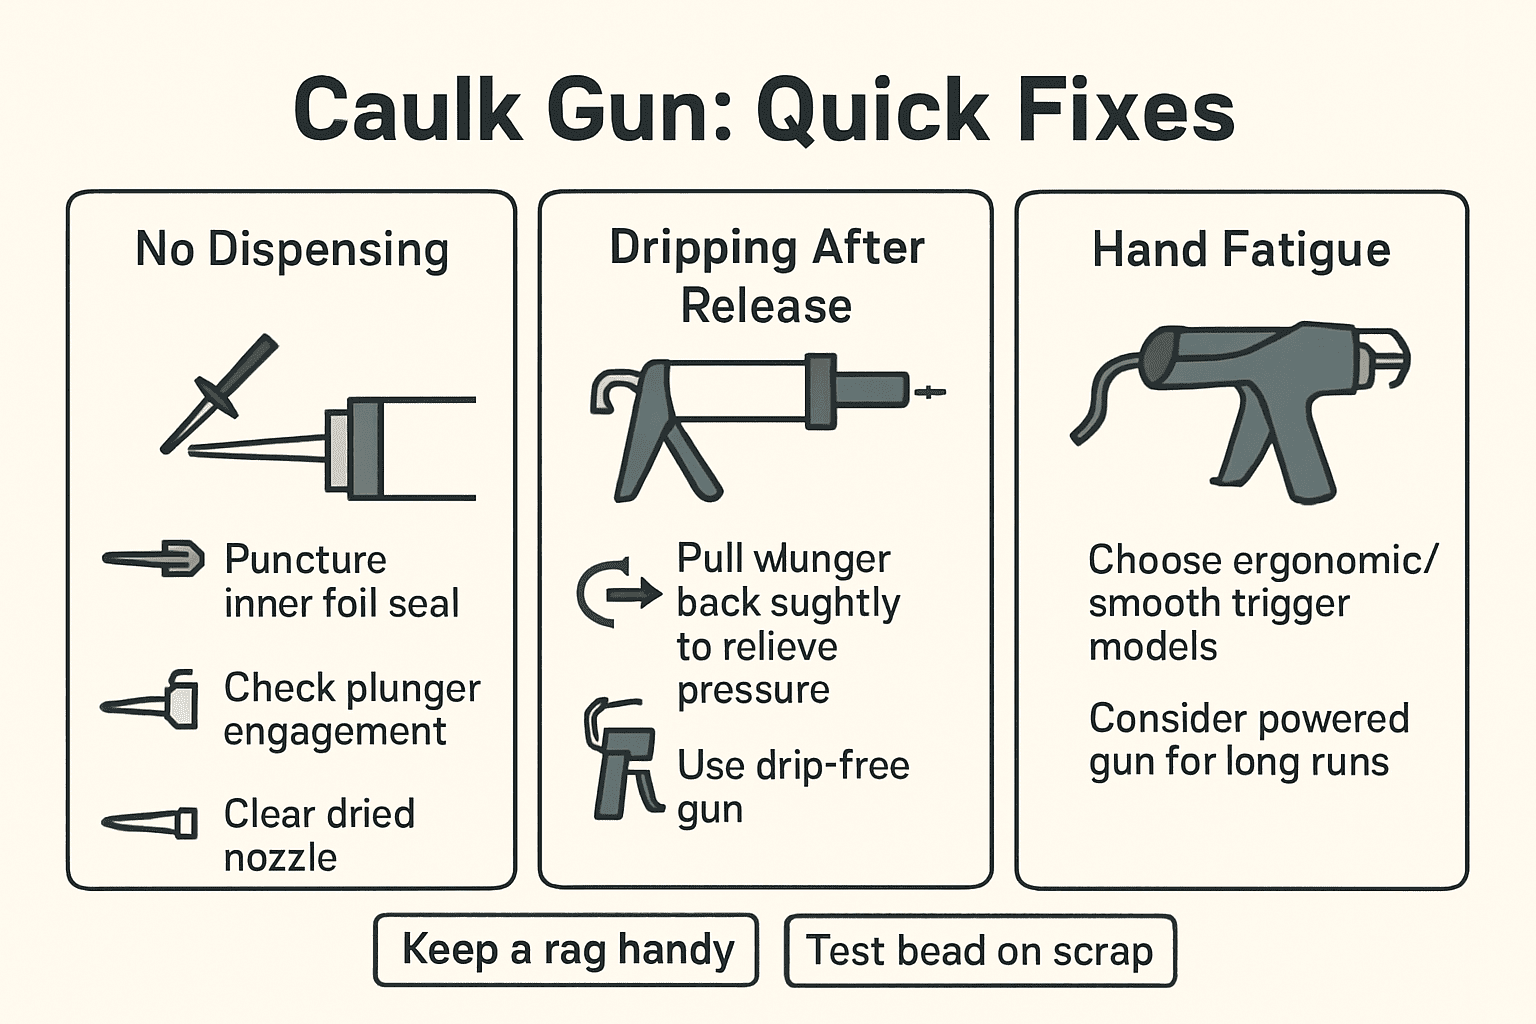
Common Caulk Gun Problems and How to Fix Them
Even with proper use, issues can arise. Here are a few common ones:
Caulk Not Dispensing
- More often than not the inner foil seal hasn’t been fully punctured.
- The plunger may not be hitting the tube.
- There may be caulk dried on the nozzle that is clogging it.
Remove the dried caulk from the nozzle and confirm the seal is intact.
Caulk Dripping After Trigger Release
- A sign that pressure is too high inside the tube.
- To release the pressure, pull the plunger back a little.
- Moreover, some dripless designs prevent this kind of issue systematically.
Hand Fatigue on Long Jobs
- You could try a caulk gun with better ergonomics and softer trigger action.
By early intervention with these minor issues, your job will remain orderly, effective, and uniform.
How to Save Caulk After Opening
Here are some ways to avoid opened caulk tubes from drying out when they become necessary:
- Insert a nail, screw, or pin into the nozzle.
- Seal the tip with plastic wrap and tape it firmly.
- Or use a tube cap that is specifically designed for sealing the tube commercially.
Let the tube stand straight in a cool, dry place, with the nozzle facing upward. Proper storage can extend the life of caulk for weeks or months, depending on the type.
Can You Use Caulk Without a Caulk Gun?
Yes, but it depends on the project.
- Squeeze tubes or pressurized cans are fine for small repairs or quick jobs.
- However, they do not have the control, precision, and consistency of a caulk gun. especially over long seams.
While it is possible, anyone doing frequent or detailed work should invest in a caulk gun for better results at their work.
Why Choose MAXXT-Tech for Caulking Tools?
MAXXT-Tech specializes in high-performance caulking tools designed for durability and ease of use. From simple manual guns to construction-grade applicators, our tools are made with:
- Smooth trigger controls
- Comfortable grips
- Anti-drip mechanisms
We also support B2B customers with bulk pricing, custom tool options, and expert advice. Whether you’re buying for a contracting business or retail hardware chain, our solutions are built to grow with your needs.
For product inquiries or bulk orders, reach out to our team. Explore more expert guides and resources on our blog.
Final Words
Mastering the caulk gun is a necessary skill for the DIYers and the professionals too. The setup, loading, application, cleanup, and storage, each step, contributes to the end result. Being aware of how to circumvent common problems, keep leftover sealant, and pick the right tool for the job, will usher in work that is cleaner and lasts longer.
Similarly, as with any other skill, one becomes better with time and practice. So, before you embark on your actual project, try using the caulk gun on a scrap surface. In addition, MAXXT-Tech has the tools and the support that you need for better builds and cleaner finishes, so you can upgrade your equipment when you feel ready.