What Is Sandpaper Grit and Why Does It Matter?
What sandpaper grit should you use for drywall? That question matters more than most people think.
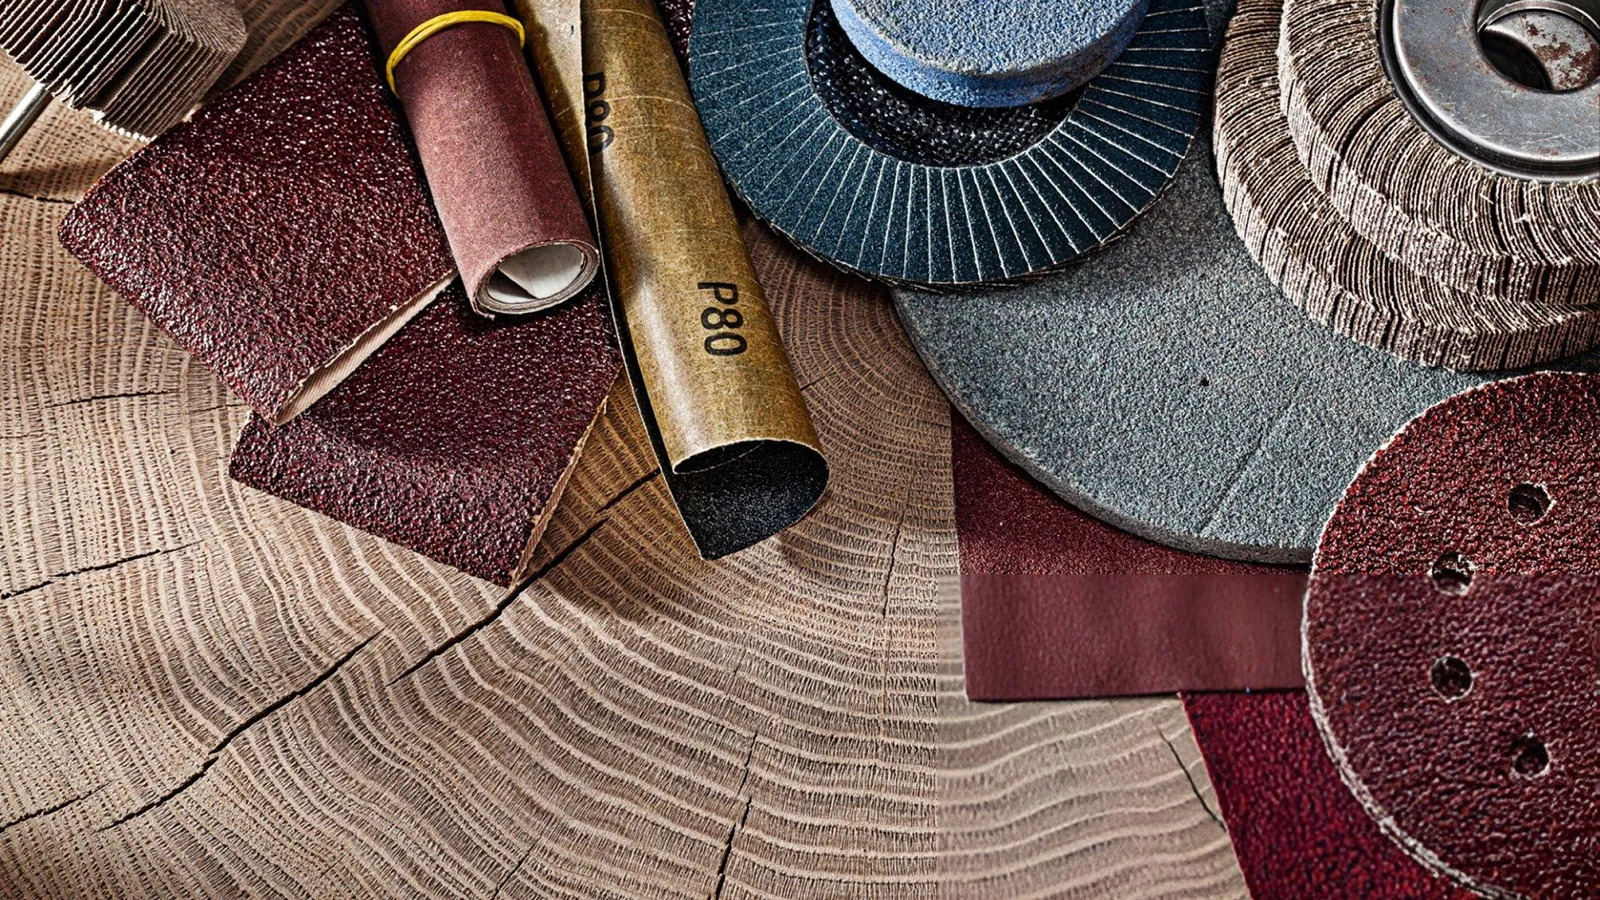
The number that indicates how smooth or rough the sandpaper is is defined as grit. The rougher the grit, the lower the number. Higher grit smoothes the surface, while rough grit removes more material. At every stage, this grit scale helps you select the ideal sandpaper for drywall.
In addition to saving time, using the proper drywall sanding grit leaves your wall smooth and clean. Selecting the incorrect one could result in surface damage or hours spent repairing uneven areas.
For example, coarse sandpaper for drywall mud may be used too much. Fine sandpaper may take a long time to work on thick spackles. That’s why the proper grit for sanding drywall depends on where you are in the job.
The key is balance. You want a grit that eliminates excess compounds without causing any scratches to the surface. You’re unsure which one to pick. This guide breaks down everything you need to know about sandpaper grit for drywall, so you can achieve clean results every time.
Grit Levels Explained: Which Grit for What Job?
Not all sandpapers are the same. Once you decide which kind of grit sandpaper is appropriate for sanding drywall, you will be able to expect chaotic effects. There is a specific cause for every degree, so it is vital to use the proper one whilst vital.
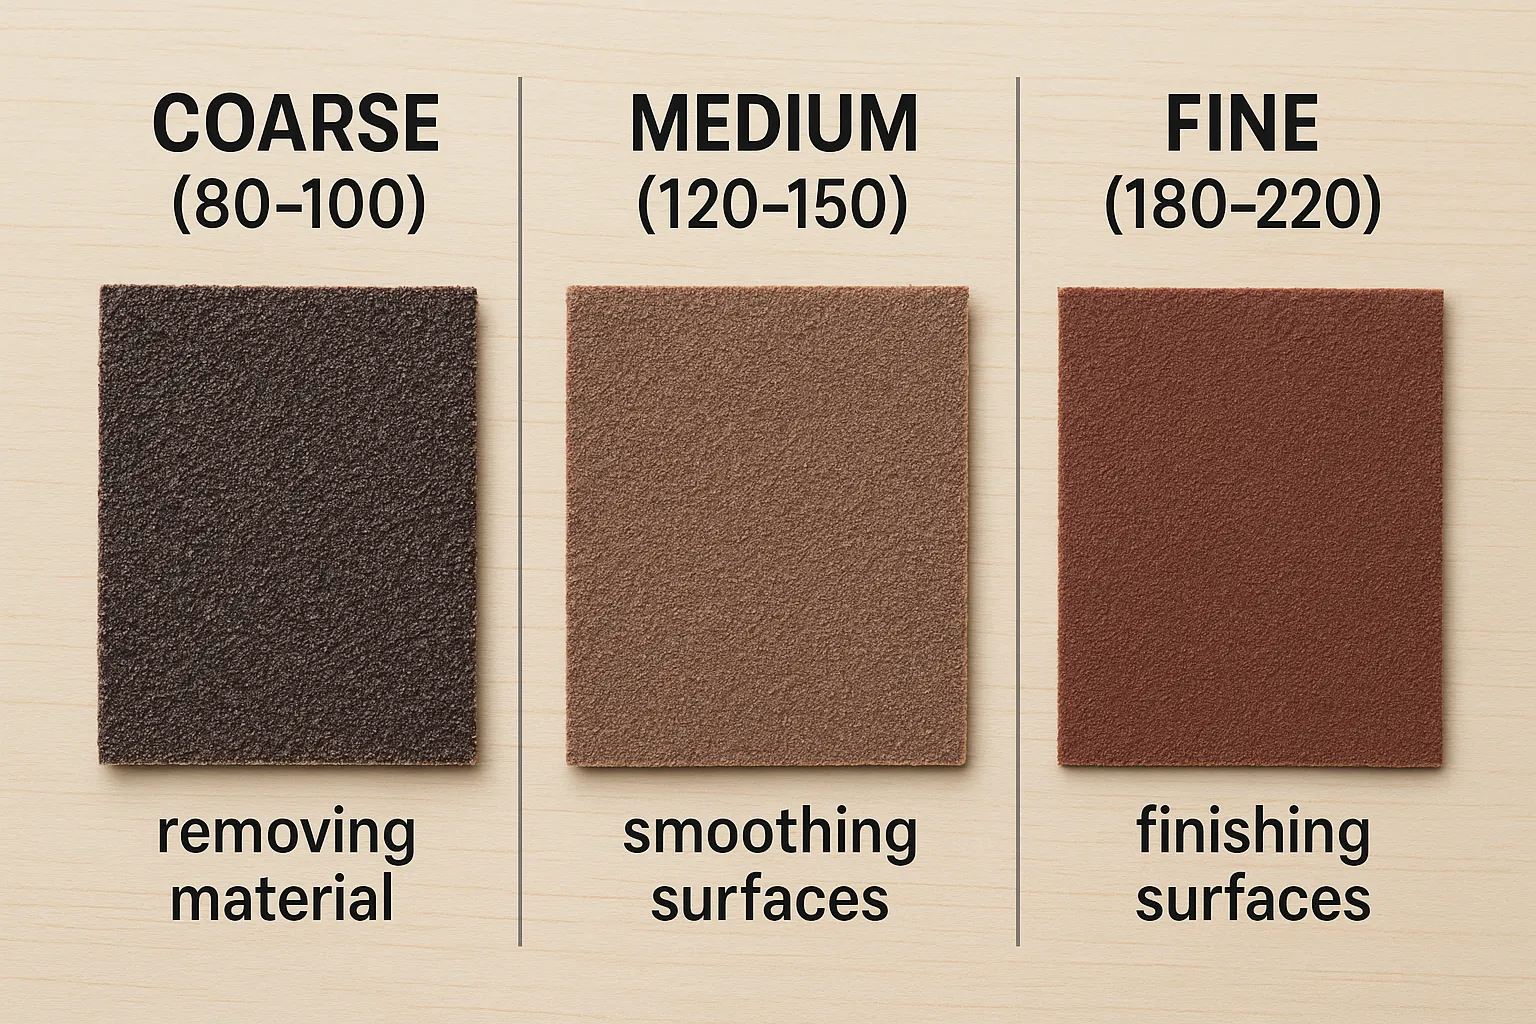
When You Need Heavy Sanding
Use coarse grit when the wall requires significant repair. This is best for removing thick layers of dried compounds or fixing uneven patches. It’s strong, but it can scratch the surface. Use it only on tough jobs that require significant smoothing.
If you’re working on old repairs or scraping off rough drywall mud, this grit works fast. But don’t use it for finishing. It leaves deep marks that are hard to hide.
For Smoothing Mud and Spackle
This one is considered the most common grit for drywall sanding. When the mud dries, medium grit helps to level the surface without any scratches. It’s perfect for the second coat or touch-ups. You’ll often see this grit used with sheet rock and sandpaper.
Medium grit is also great for sanding spackles. If you’re asking what grit sandpaper is for drywall spackle, this is your answer.
For the Final Touch Before Painting
This is your finishing grit. You’ll get a soft and smooth surface wall that’s ready for paint or primer. You need fine-grit sandpaper when you’re asking what grit sandpaper is for drywall before painting.
What makes it ideal is that you can use it for light touch-ups and sanding after the final coat. Avoiding streaks or swirl marks beneath the paint is made easier by using fine drywall sandpaper.
You can improve control and achieve a cleaner finish by selecting the appropriate grit for each step. Each level works together to prepare your wall for the final look.
On a typical drywall project, sanding is just one stage in a longer workflow that starts with cutting and fastening the boards. If you want a clearer picture of the tools professionals use at the beginning of this process, Best Tools for Cutting Drywall offers a practical overview of cutting solutions for different job sizes.
Pick Your Sanding Method: Hands, Tools, or Sponge?
Choosing what grit sandpaper for drywall is only part of the job; the tool you use to sand matters just as much. Different tools are more effective for different areas of the wall.
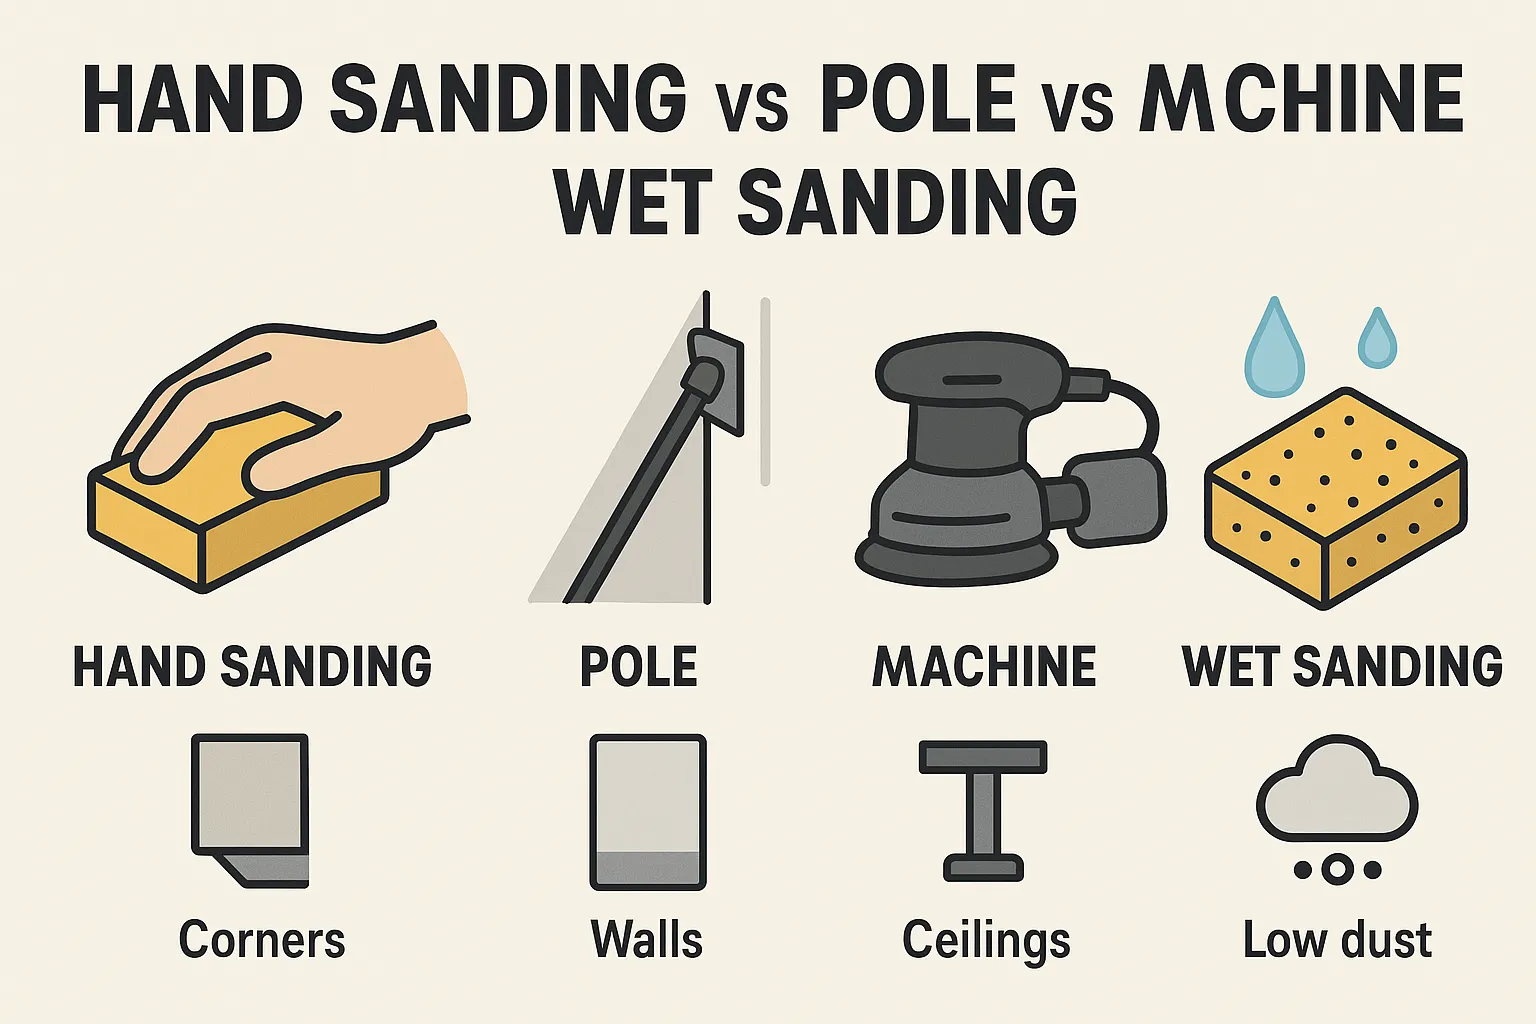
Manual Sanding
This method gives you the most control. Use sandpaper for drywall repair or a sanding block for small spots, corners, or patch jobs. Manual sanding is effective for filling holes or smoothing small areas. It’s slow but precise.
To smooth the compound without causing any damage to the surface, use it in conjunction with drywall sanding paper that has a grit of 120 or 150.
Pole Sander
When sanding full walls or ceilings, a pole sander saves your arms. It helps you reach high areas and cover large spaces quickly. Combine it with medium grit sandpaper for Sheetrock to smooth joints and seams.
Just be careful around the edges. Pole sanders can dig into corners if too much pressure is applied.
Power Sander
For bigger projects, a power sander gets the job done fast. It reduces your sanding time but requires skill. Use it gently to avoid leaving marks. This tool works well with grit sandpaper for drywall in the 150–220 range.
Many contractors rely on wholesale drywall sanders for efficient, smooth sanding without the dust and mess. Are you unsure whether to use a pole sander, a hand block, or a power tool? This breakdown of power sander vs hand sanding will help you decide based on your project size and skill level.
Wet Sponge Sanding
This is a low-dust method for finishing work. It works best with thin compound layers. It’s slow but keeps your space cleaner. If you have asthma or want to avoid dust, this is a solid choice.
Each method has its place. Match your sanding tool to your task and always pair it with the right drywall sandpaper grit.
On detailed work around outlets, trim, or small cutouts, many professionals also turn to oscillating multi‑tools for precise trimming and spot repairs. If you are considering this tool category for drywall and general renovation work, How to choose the right Oscillating Multi-Tools explains the main configurations and features to look for.
Match the Grit to the Stage of Your Drywall Job
You should know what sandpaper grit for drywall to use at each stage, to make your work easier and cleaner.
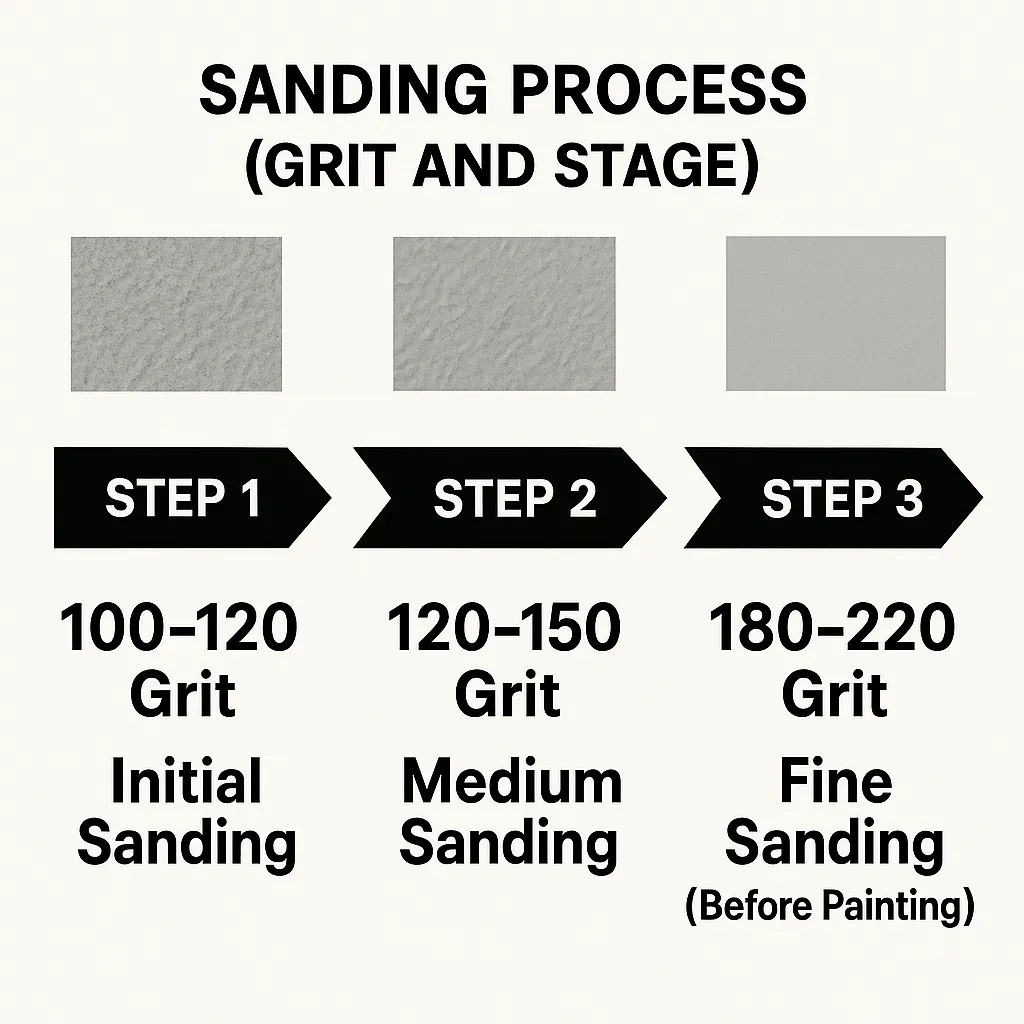
First Coat: 100 to 120 Grit
Start with medium grit after the first layer of joint compound has dried. This grit smooths out high spots and blends edges without removing too much. It’s the best sandpaper for drywall during the early shaping stages.
Second or Third Coat: 120 to 150 Grit
Use a finer grit once you apply your second or third coat. This helps remove lines, feather edges, and even out the surface. What grit sandpaper is used for sanding drywall at this stage? You can use 150 grit for smooth and fast sanding.
Before Painting: 180 to 220 Grit
Fine grit is your final step to make the surface smooth and paint-ready. 220 grit sandpaper is an excellent choice for drywall before painting. It removes tiny bumps without damaging the surface.
Each assignment, from entire installations to patching minor holes, can be completed with this order. You could prevent defects and save hours of transforming with the aid of the best grit for drywall sanding at the right time.
Use this grit route in conjunction with high-quality equipment, consisting of drywall sanders, to gain results akin to those of an expert.
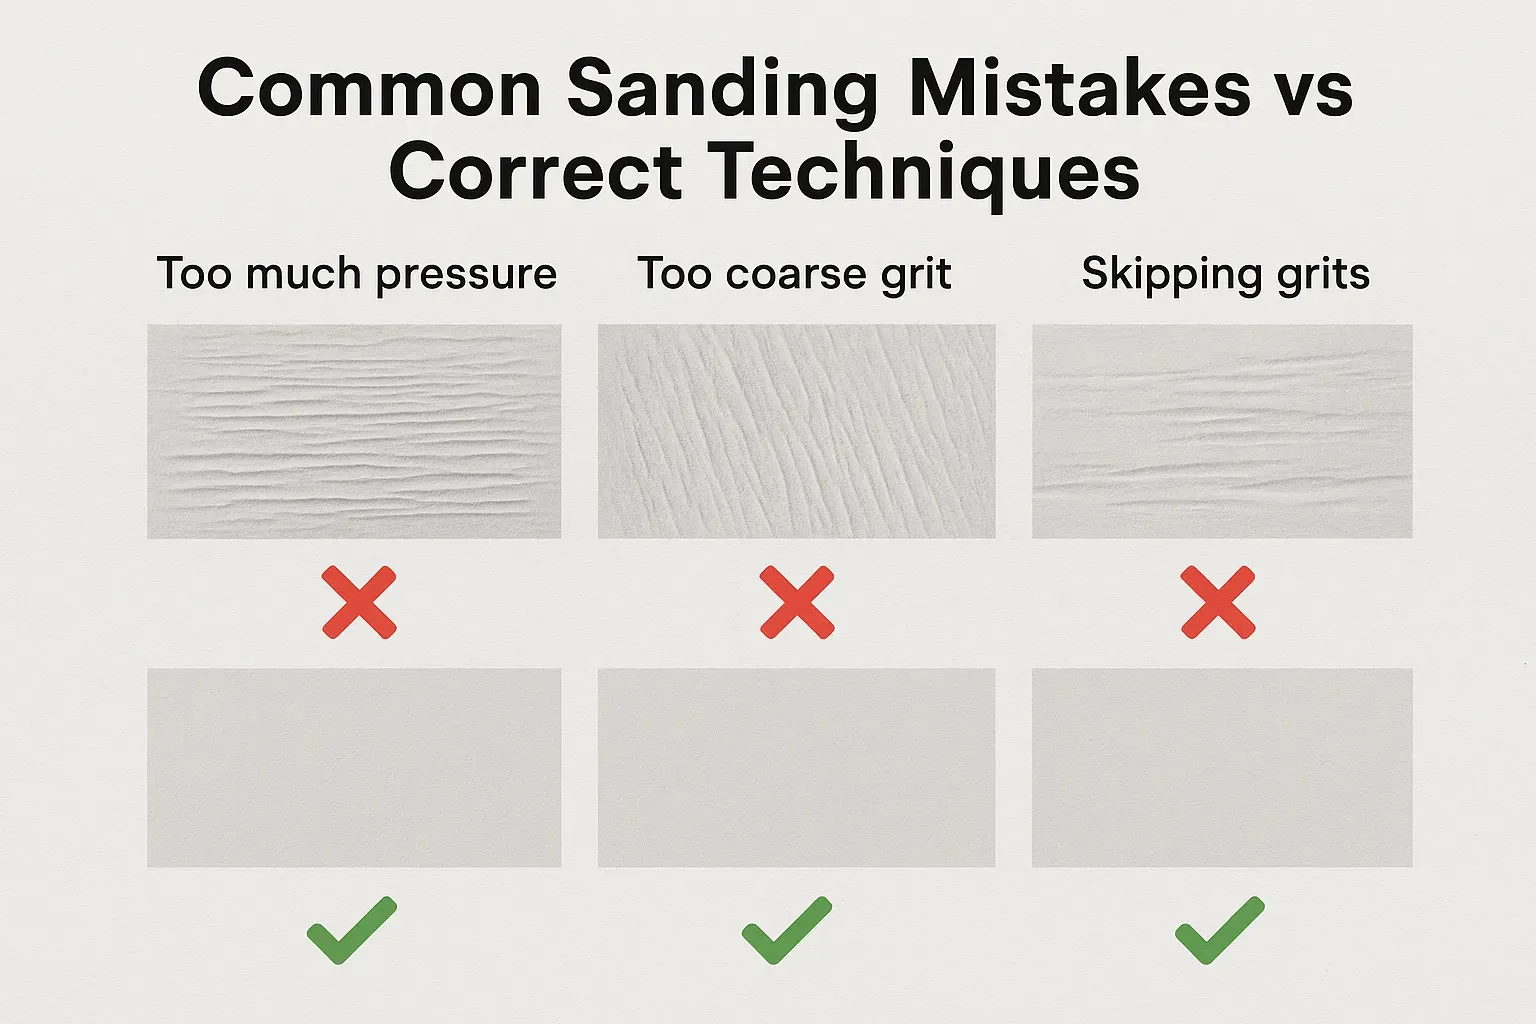
Common Sanding Mistakes and How to Avoid Them
Even with knowledge of the type of grit sandpaper to use on drywall, errors can still happen. Common sanding errors can save you time and prevent costly repairs.
Starting with Grit That’s Too Rough
To expedite the process, many do-it-yourselfers start with 80 grit. For drywall, coarse-grit sandpaper may leave scratches that pierce the paint. Always start with a small area to test. Otherwise, unless you’re repairing significant damage, use 120 grit.
Skipping Grit Levels Too Quickly
Jumping from rough to fine grit sounds smart, but it doesn’t work. Each grit prepares the wall for the subsequent grit, skipping over bumps or grooves at the back. For clean effects, use 120, then a 150 and 220.
Over-Sanding or Damaging the Surface
Your work can be ruined by applying too much pressure or sanding in one area. It’s easy to overdo seams and corners. Stop if the drywall’s paper face or tape is visible. You’ve gone too far.
Use only the best drywall sanding paper, and examine your surface frequently in well-lit areas. Common sanding problems can also be avoided with the use of tools like our dust-free systems.
Your drywall will appear neat and expert if you steer clear of these easy errors.
Tools That Make Sanding Easier (And Safer)
Once you’ve selected the sandpaper grit for drywall, the right tools can make the job easier and cleaner. Good tools save you time and protect your health.
Sanding Blocks vs. Screens
Sanding blocks give you control. They hold the paper flat and help with even pressure. Screens last longer and don’t clog as fast. Both are useful depending on the job. Choose blocks for corners and screens for larger areas.
Vacuum Attachments and Dust Protection
Drywall sanding generates a sizable amount of dirt. That’s why many professionals use sanders with vacuum attachments, our Sanders built-in dirt collection to build in the air smoothly.
Drywall dirt poses a health danger and an annoyance. To restrict publicity to hazardous particles, the U.S. Occupational Safety and Health Administration (OSHA) recommends sanding integrated drywall while wearing a dirt mask, goggles, and a properly air airway.
Airborne dust can also be reduced via a vacuum or wet sponge method. The Environmental Protection Agency (EPA) states that retrofitting a smoother air system is vital for long-term health and protection.
Proper Lighting Helps You Spot Flaws
Always check your wall under good lighting. Use a work light placed at an angle. It helps you find bumps, ridges, or scratches left by rough sandpaper for drywall compounds.
Bonus: Prep Checklist
- Choose the correct grit.
- Put on the safety gear
- Use a block or sander.
- Work in a well-lit space
Safe sanding is the smart sanding and the right tools also help you work faster and get better results with less mess.If you are still evaluating which sanding equipment to invest in for different room sizes and project types, Best Sanders for DIY Enthusiasts of 2025 compares several popular sander designs and highlights which users and applications they are best suited for.
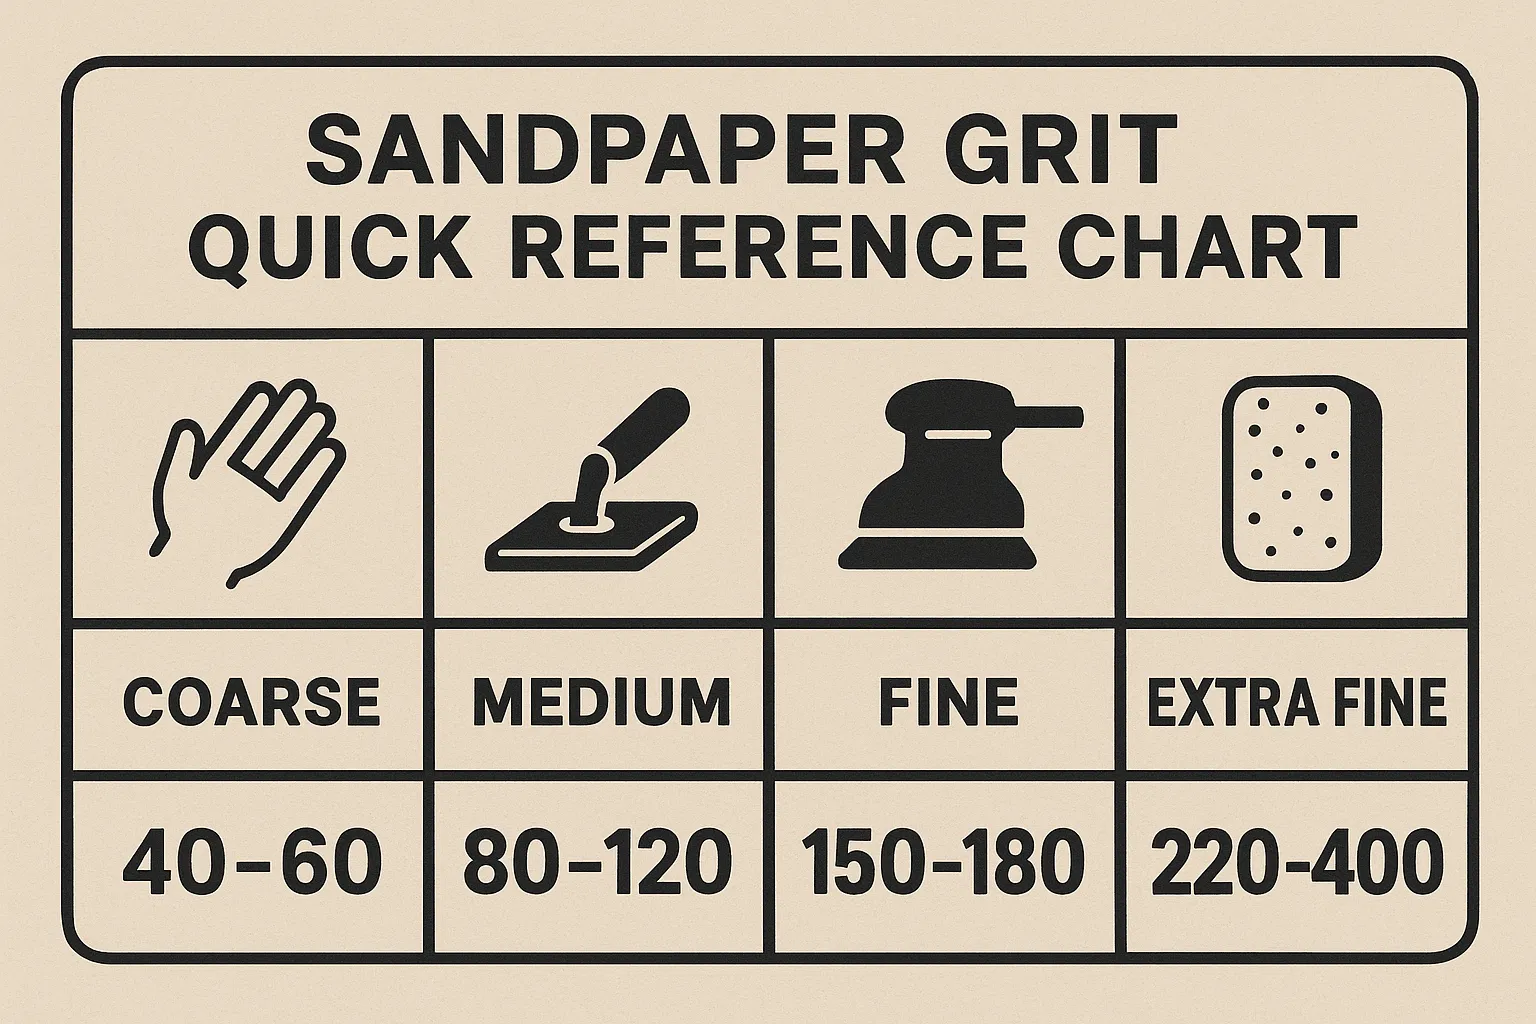
Quick Reference Grit Guide You Can Bookmark
Need a fast reminder of what size grit sandpaper for drywall to use? Here’s a quick grit guide to keep nearby.
Manual Sanding (Small Repairs & Corners)
- Start with 120 grit
- Finish with 150 grit.
- Great for detail work and patching small holes
Pole Sander (Walls & Ceilings)
- Begin with 120 grit
- Finish with 180 grit.
- Ideal for smoothing full wall seams and joints
Power Sander (Larger Surfaces)
- Start with 150 grit
- End with 220 grit
- Best for big jobs and quick finishing
Sponge Sanding (Tight Spots)
- Use the best drywall sandpaper or sponge with 180–220 grit.
- Perfect for low-dust sanding near outlets or trim
Preserve this list throughout your assignment. It facilitates you in avoiding guesswork and provides a clean, paint-ready surface every time.
Prompt Answers to Common Questions
Still wondering what grit of sandpaper works best for final drywall sanding? Here are some fast answers to common questions.
- Can I start with 220 grit?
Only if the wall is already smooth. 220 grit is for finishing, not shaping. If you start with it too early, it won’t remove enough mud or bumps.
- Can I reuse sandpaper?
Yes, but only if it’s still cutting well. When it clogs or feels smooth, replace it. Worn sandpaper for sanding drywall leaves streaks and wastes time.
- Do I need to sand between every coat?
Sure. Every coat needs mild sanding to mixture seams and remove bubbles. Use a hundred and twenty to a hundred and fifty grit among coats, and finish with 220 grit before painting.
Final Tips: Get a Smooth Wall Every Time
earlier than you begin sanding, pause to remember: what sandpaper grit for drywall yields the first-rate results? That one desire can form the entire challenge. To decide whether the grit is simply too coarse or too hard, continually check a small patch first. This smooth step saves time and prevents harm. To shape, use medium grit. After that, use high-quality grit to complete. The wall has an easy and clean surface while the right collection of 120, 150, and 220 is followed. Make certain to put on goggles and a dust mask. Work in a place with suitable lighting fixtures so you can see all of your imperfections.
If you want tools that make the job easier, explore MaxXT’s complete line of drywall sanding products. We offer pro-grade sanders, sanding blocks, and dust-manipulate add-ons that will help you work quicker, safer, and cleaner.
Not sure which setup is proper for you? Our support is right here to assist.