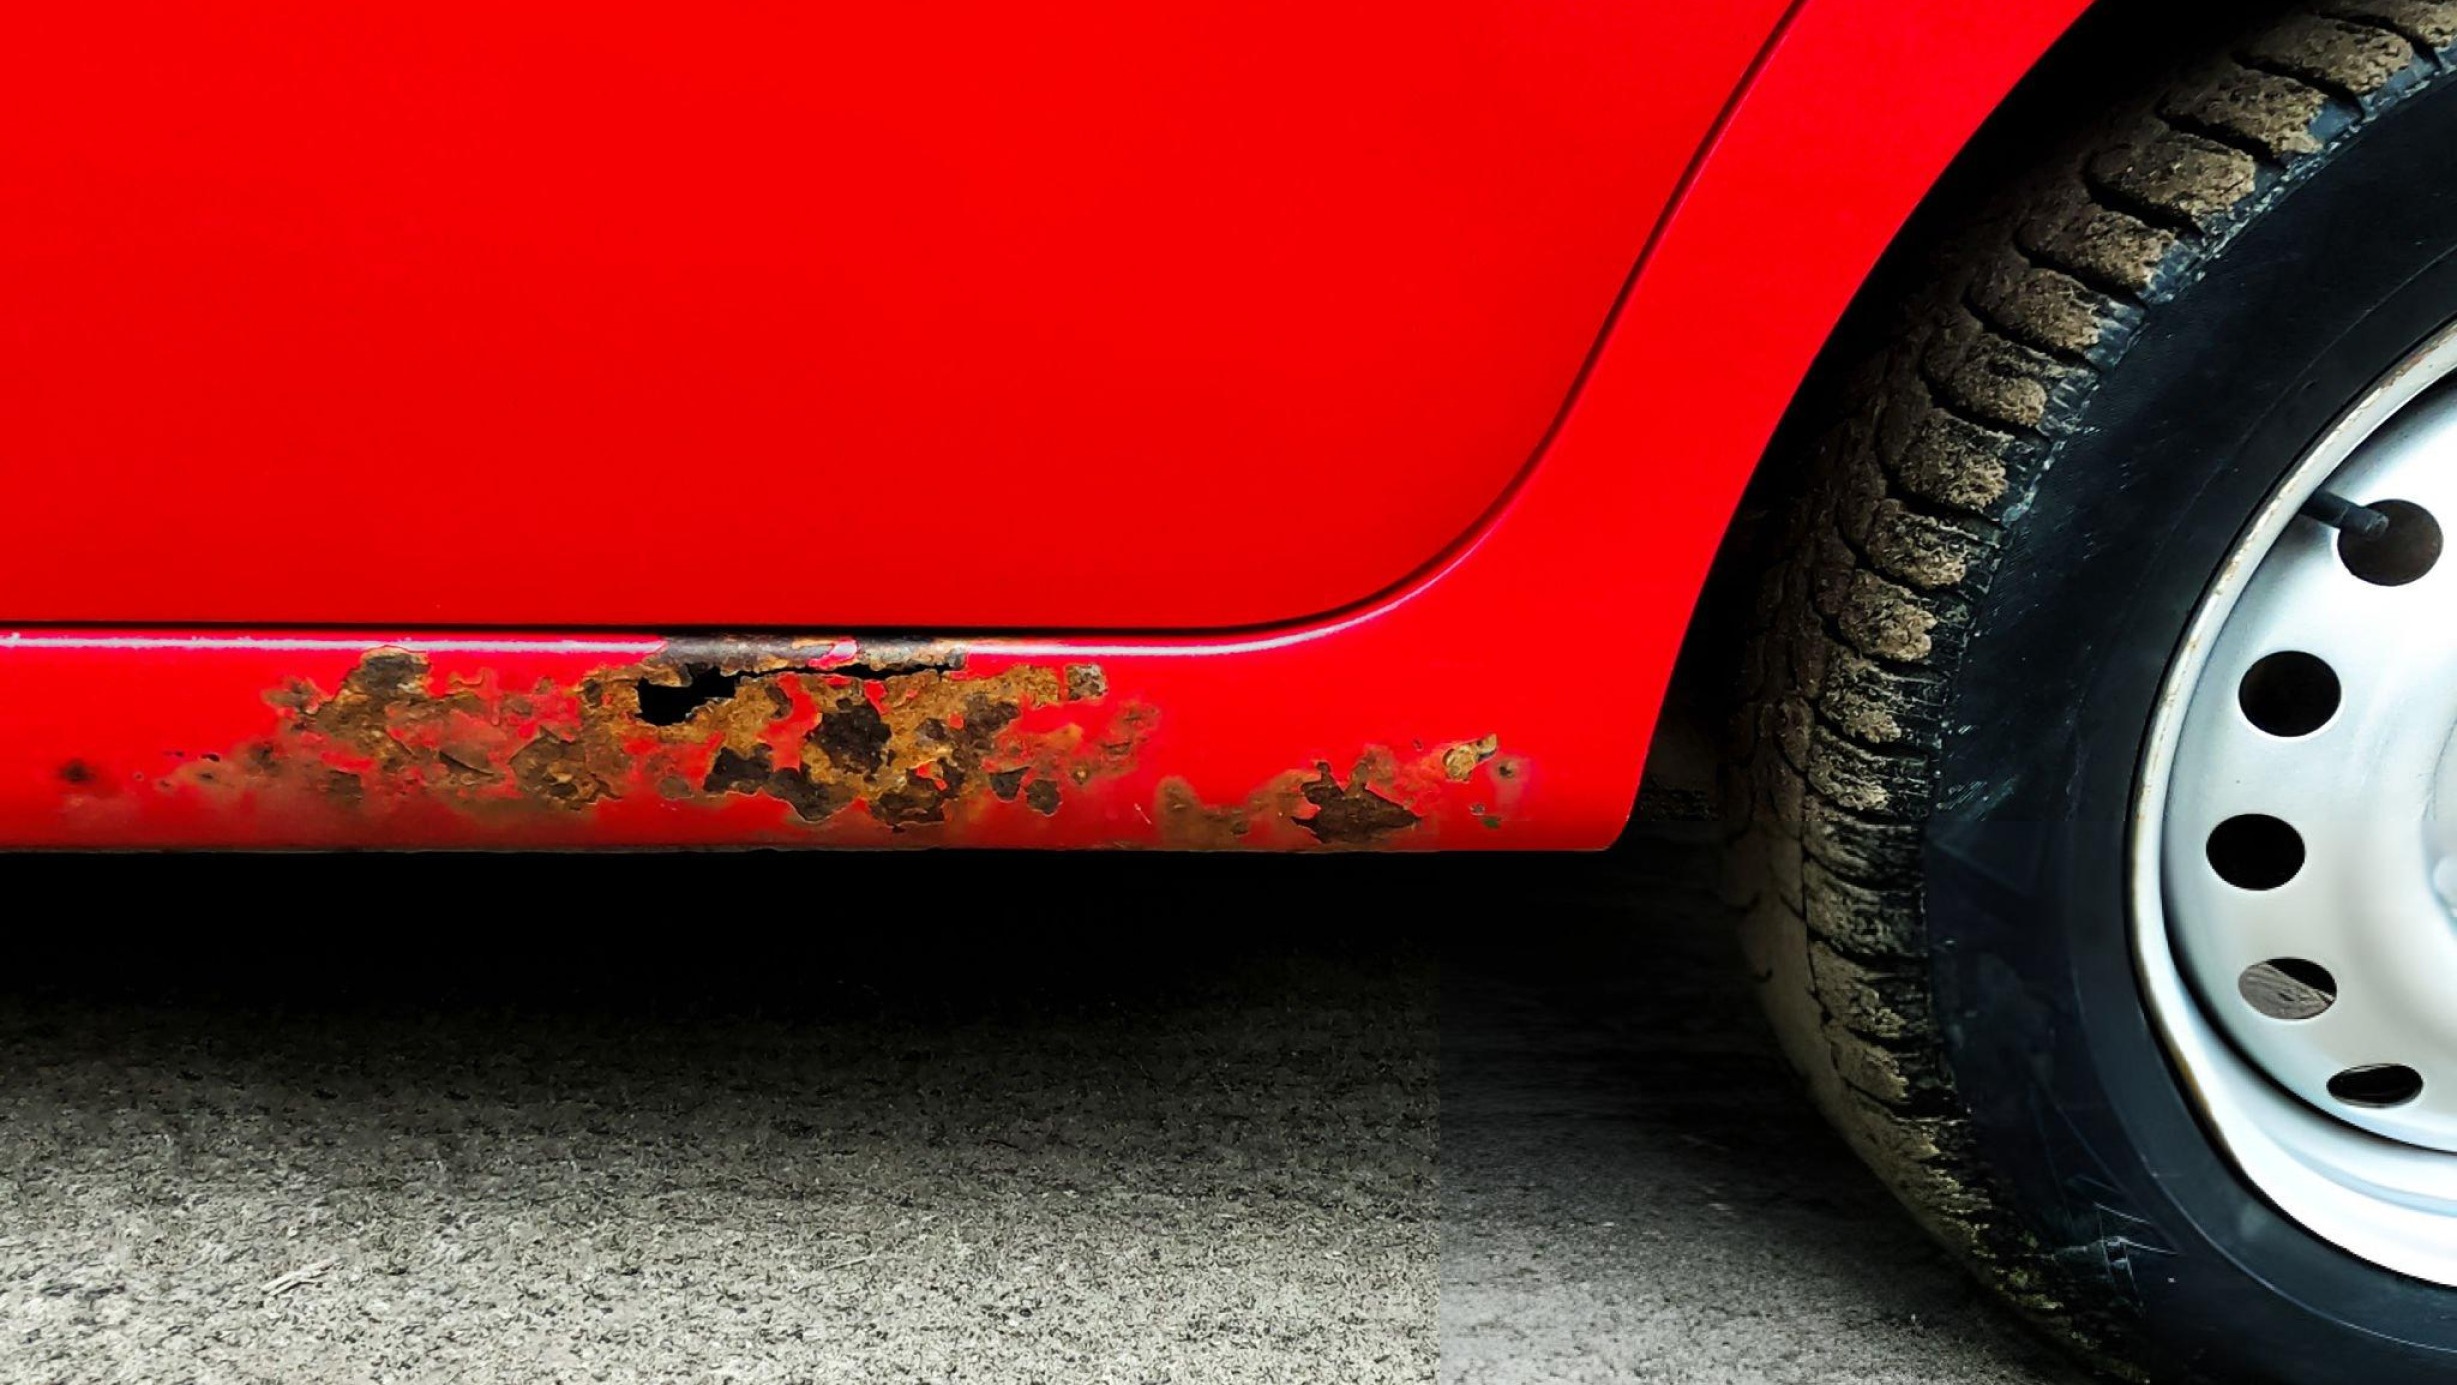
When you see signs of rust on your car it is not some curse aimed at you personally – car rust is very common. If you have decided to fix the rust on your car yourself, you’ll know that car rust repair can be rather tricky, and if it’s not done properly, the rust can resurface.
We have prepared a detailed guide for our readers who are interested in learning how to get rid of car rust.
Understanding Why Cars Rust
Rust is the result of a chemical reaction between iron or steel, oxygen and water. Called oxidation, the reaction causes iron oxide to form, also known as rust.
Rust on a car is usually the result of the climate, the age of the vehicle, and body damage. High humidity, rainy conditions, and snow, which require salt to be put on the roads, are ideal conditions for rust to start forming. Rust damage is also caused by small scratches, chips, or bumps that expose bare metal, making those areas more vulnerable to rust.
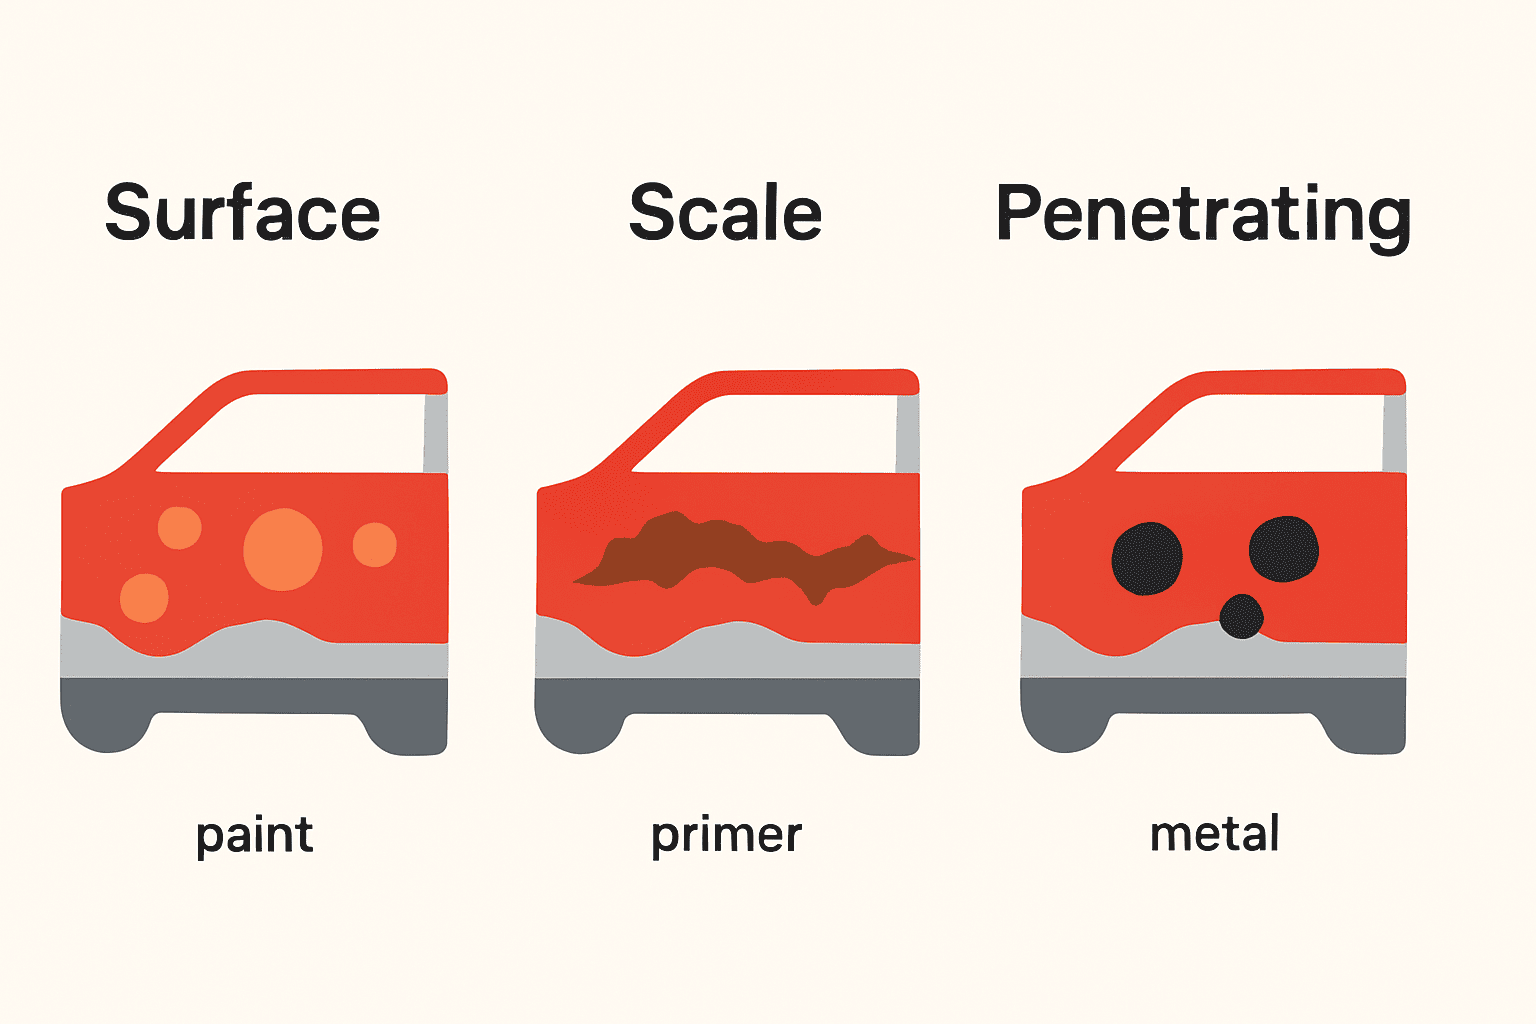
Types of Rust
There are three levels of rust damage.
Surface rust – This is the most common type of rust and is the least serious. It involves only the top surface of the car and doesn’t cause major damage. However, if you don’t attend to it promptly, it can spread and cause more penetrating damage. Surface damage forms bubbles under car paint.
Scale rust – This is stage 2 rust, where the surface rust has been left untreated, resulting in some of it penetrating the metal surface. When this happens, the rust looks like flakes of thin, brown metal. If left untreated, the metal underneath starts corroding.
Penetrating rust – When surface and scale rust are left untreated, you sit with rust that will penetrate deeper, undermining the integrity of the metal. You want to prevent this level of damage because it will eventually necessitate the replacement of entire body parts and panels.
Early Signs of Car Rust
It’s a good idea to regularly inspect your car for signs of corrosion. The areas most at risk for rust are those exposed to moisture, road salt, and the road surface, including the wheel wells, fenders, undercarriage, exhaust system, and the edges of doors and panels.
You will know that something is brewing when you see paint bubbles lifting the car paint, or brown crumbling appearing on the door and panel edges. Rust on cars appears mainly as bubbles in the paint or patches of discoloration.
Rust can also hide on the undercarriage, including the exhaust. A rough, brown crust on the steel or metal components is a sure sign of rust. Rust that started on the outside can also steal to the inside of the car, especially via the door edges.
Regularly inspecting your car for early signs of rust presents an opportunity to take timely action and prevent the damage from spreading. It’s essential to know how to fix rust on a car as it has a negative impact on its value. Unless you take timely action, rust will not only corrode your car, but also its value.
Gather Restoration Tools and Materials You’ll Need
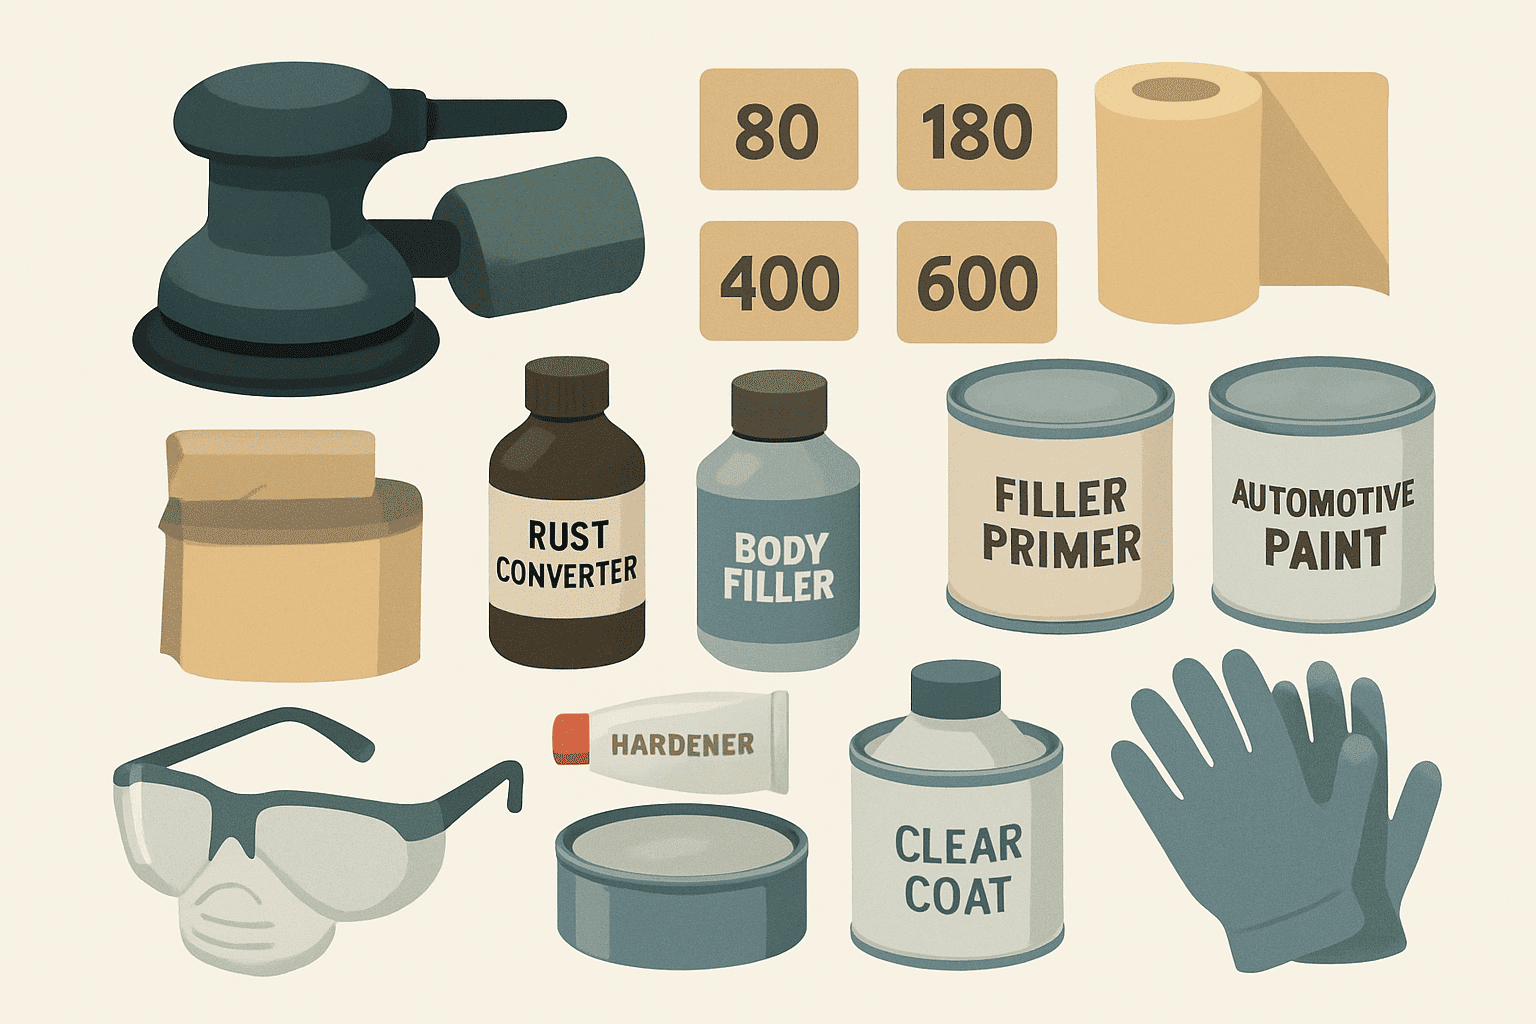
Tools
- Wire brush – to remove rust
- Sandpaper – buy coarse grit (40 – 80 grit), medium grit (120 -180 grit), and fine grit (220 – 400 grit).
- Orbital sander
- Masking tape and paper – to seal off and protect surrounding areas while sanding and painting
- Rags – to wipe up rust and debris
- Spray gun – for spray painting the repaired area
Materials
- Rust converter – to convert rust into a stable surface that can be painted
- Body filler (if needed)
- Primer
- Clear coat
- Automotive paint
Safety gear
Safety glasses, a dust mask, and gloves
How to Repair Rust Damage on a Car (Step-by-Step)
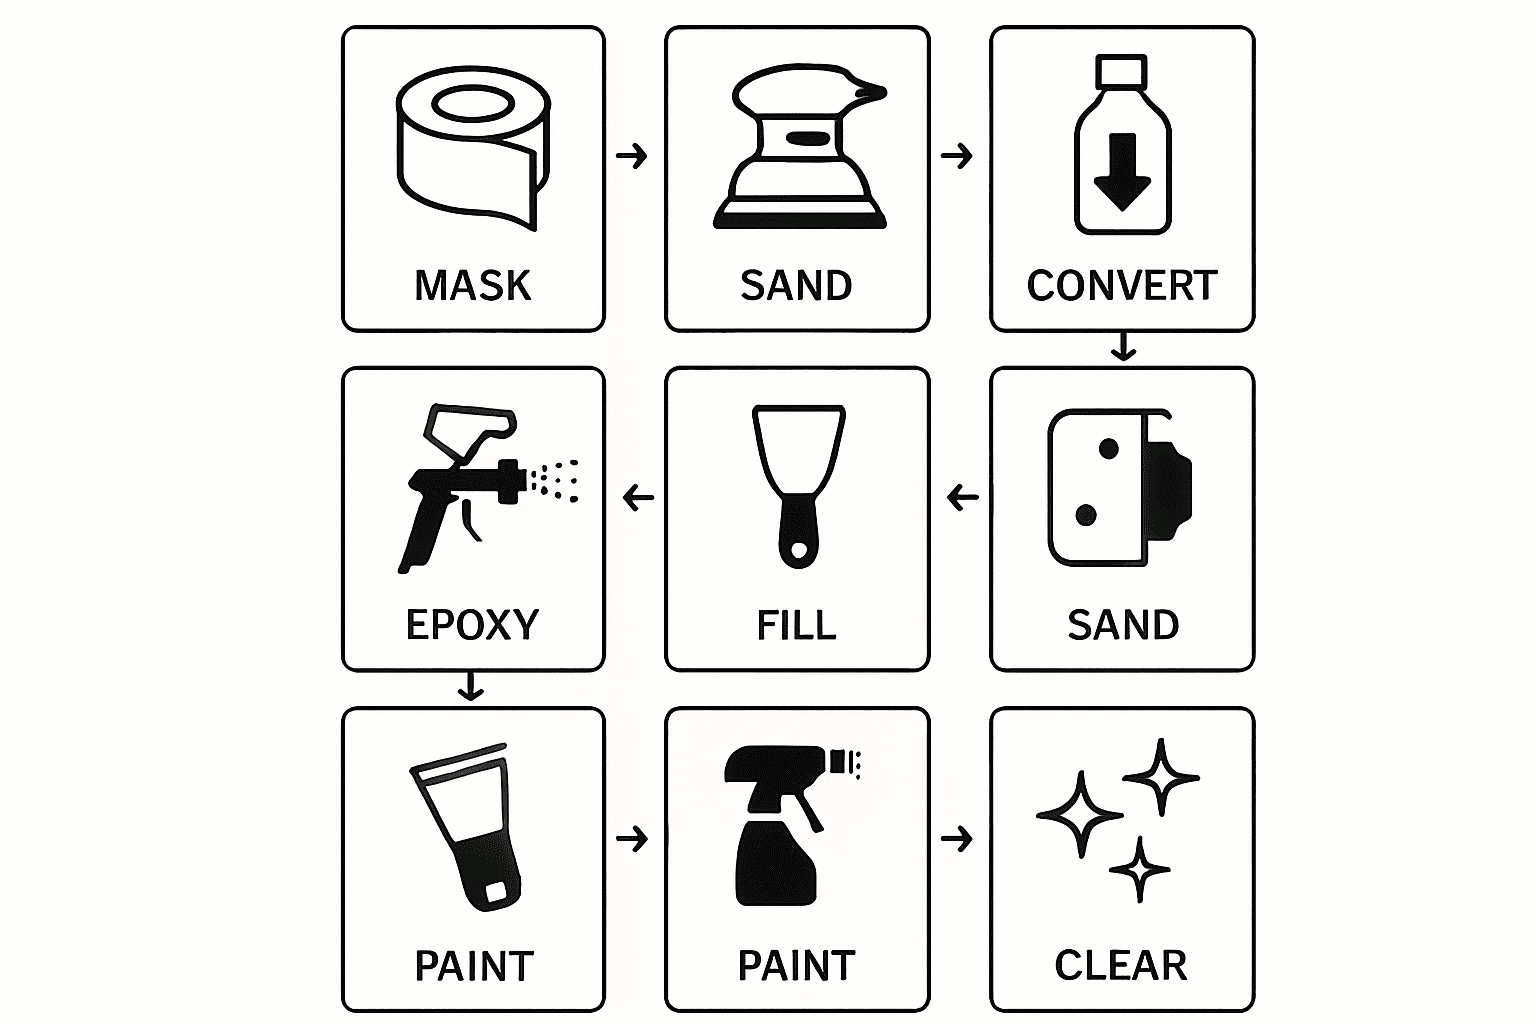
Step 1: Mark the Rust Area Off
Inspect the entire car for signs of rust. Cover the area you’re not working on with plastic sheeting or newspaper and tape down with masking tape. Clean the rust area to expose the full extent of rust. Prepare the area by washing it thoroughly so you have a clean surface to work with.
Step 2: Sand Down the Rust
Start removing loose rust with a scraper. Then, use a coarse-grit sandpaper with a rastgele yörüngeli zımpara to remove the majority of the rust from the surface. Once the bulk of the rust is gone, switch to a medium-grit sandpaper to smooth the area and feather the edges of the repair zone so it blends with the surrounding paint. Finally, finish with a fine-grit sandpaper to create an even, smooth surface ready for priming.
Use a rag to remove rust particles and debris that have been accumulating.
Step 3: Apply Rust Converter
For areas that are difficult to reach with the grinder, use rust converter. Rust converter is a compound that chemically reacts with rust, neutralizing the oxidation. The reaction converts the rust into a surface that can be painted.
Follow the manufacturer’s instructions and allow the converter to dry completely, which may take a few hours. Once dried, wash the area thoroughly with detergent and water, rinse off, and dry.
Step 4: Apply Epoxy Primer
Treat and seal the bare metal with epoxy primer, which protects against future rust, and creates an excellent surface for pain to adhere to.
Step 5: Choose the Right Filler
Once sealed, you’ll need the right filler to smooth the surface in preparation for painting. For surface rust, a traditional body filler (Bondo-type) is effective. For more severe rust damage, such as holes or weak spots, fiberglass filler offers a more robust solution, adding extra strength.
Make your choice based on the depth of the damage: body filler for shallow repairs, and fiberglass where the rust has eaten through the metal and structural reinforcement is needed.
Car Rust Repair with Epoxy Primer & Filler Primer
Apply Epoxy Primer
On a clean, dry surface with the rust removed, apply epoxy primer. Follow the manufacturer’s instructions to mix the primer and load it into a spray gun. A spray gun with a 1.3 mm-1.4 mm tip is ideal for this purpose. Spray a thin, even coat over the bare metal and around it to ensure full coverage. Allow the first layer to cure completely and follow it up with another thin layer. Check the manufacturer’s guide to know how long the primer needs to dry.
This is an important step because the epoxy primer seals the metal, providing effective protection against rust and moisture, and providing a solid foundation for the filler primer and paint.
Once the epoxy primer is completely dry, sand it and feather the edges, using a 320–400 grit sandpaper. Feather the edges outward into the surrounding paint to create a smooth, invisible transition between the repair and original finish.
Move onto wet 600-grit sandpaper and then to wet 1,000-grit sandpaper to create an ultra-smooth transition from the repair area to the surrounding painted area.
When you’re satisfied with the results, clean the area with water and wipe it dry. When completely dry, use a lint-free cloth to wipe the area before applying the filler primer.
Apply Filler Primer
Apply a coat of filler primer and allow it to dry for about an hour. Apply another coat and allow that to dry as well, each time extending the coat slightly. Add a final coat and let it dry completely. Check the surface for drips and uneven areas and sand them down with 320-grit sandpaper. Sand the entire repair area a final time.
The surface should now be smooth and level, ready for painting.
Car Rust Repair with Fiberglass
Follow steps 1 to 3 above to remove the rust and prepare the area, then proceed to apply the fiberglass.
Apply Fiberglass
Use long strand glass fiber repair gel to do the repair work. Mix the gel and hardener according to the manufacturer’s instructions. Put the fiberglass from behind to cover the damaged area. Refer to the instructions to determine the recommended drying time.
Sand Fiberglass
The fiberglass will be uneven where you pushed it through, but you can use an açılı taşlama makinesi to even it out. If any holes or indentations remain, don’t worry, you can fix that with body filler, which is smoother to work with.
Apply body filler
Mix body filler with hardener and spread it evenly over the area using a flexible applicator. Press it firmly to fill in gaps and create a flat surface with minimal low spots.
When the filler has dried, use a 400-grit sandpaper, or coarser, to sand over the fiberglass. Sand until the surface feels smooth and flush.
Finish up by cleaning the area with mineral spirits. When the surface is dry, give it a final wipe with a tack cloth to remove any dust or lint.
Apply Epoxy Primer and Wet-Sand
Spray epoxy primer over the repair and surrounding bare metal. Start with a light coat, then follow with a heavier one. Let it dry between coats according to the product instructions.
Wet-sand the primed area with a high sanding grit (at least 400) to ensure a smooth finish. Do two to three primer coats with sanding between each coat. End with 600-grit sandpaper.
Apply Paint
Whichever method you used to do the car body rust repair, when you have applied the epoxy primer, the surface is ready to be painted.
Spray two or three thin coats of paint over the primer and some way into the original paint. Hold the paint sprayer about 12 inches from the surface. Start at the lowest point and move the sprayer smoothly to and fro until the entire surface is covered. Use smooth, continuous movements so the paint doesn’t build up in some places.
Allow enough time between coats for the paint to dry to the touch before applying the next one.
Not: Aim to cover the repair area with a solid layer of the base paint, without leaving runs or sags, so you won’t need to do any sanding. It is not advised to sand the base coat. If necessary, lightly wet-sand the problem area with 400-grit sandpaper. You will have to respray the area.
Apply the Clear Coat
The clear coat provides a high-gloss finish and a hard layer that protects the vehicle against environmental damage. You might need to do a few practice runs before you attempt this part of the rust repair job. Clear coats are very runny and therefore challenging to apply perfectly. You need to apply several thin layers and allow them to dry according to the manufacturer’s guidelines.
After the Clear Coat: Should You Wax or Polish?
Polishing and waxing have different objectives: polishing removes imperfections, while waxing adds a protective layer to protect against UV rays, water, and road grime.
Polish your car after rust repair only if you notice any imperfections in the clear coat. Use microfiber cloth (not a polishing machine) and polishing compound to buff the area. Use polish only if the finish needs correction—skip it if the surface already looks smooth and glossy.
Take care to clean the entire area with a microfiber cloth so no residual polishing compound remains on the car.
After at least a month has passed, you can apply car wax. Purchase purpose-made car wax to finish off your rust repair job and give your car a glossy, reflective finish.
SSS
Can you paint over car rust?
You can, but it’s not advisable. Painting over rust without removing it first will cause the rust to continue, weakening the paint over time. Always remove rust completely before priming and painting.
Is Epoxy Primer Really Necessary?
Yes, especially if bare metal is exposed. Epoxy primer seals the surface, including metal, preventing future rust. It creates a strong bond for paint.
How can I Prevent Rust on My Car?
- Keep your car dry as much as possible.
- Wash and dry your car regularly, especially in winter.
- Touch up paint chips as soon as they appear to prevent rust from developing.
- Wax your vehicle a few times a year to protect the paint.
How long does car rust repair take?
How long it takes to fix rust on a car depends on the extent of the damage. A basic DIY rust repair job can take 4–8 hours over one or two days, depending on waiting times for layers to dry.
Cost of DIY vs. Professional Repair
DIY car rust repair normally costs $50–$150, including sandpaper, filler, primer, and paint, provided you already own an yörüngeli zımpara makinesi and a spray gun.
Professional car rust repair is more costly. Factors such as damage severity, labor cost, and auto repair expertise contribute to the final cost, which can range from $200 for a small job to $1,000 and more for an extensive repair job.
Doing the job yourself is cheaper but requires tools, time, and patience. A professional job is more expensive but more convenient and ensures a professional finish.
Çözüm
With some basic materials, the right tools for the job, and by following the suggested steps, fixing rust on a car is manageable. It’s a matter of keeping an eye out for early signs of rust and addressing them promptly.
By carefully removing the rust, applying fiberglass or body filler as needed, and using epoxy and filler primers correctly, you can repair the damage and create a smooth surface to paint and seal with a clear coat. Taking your time at every stage and paying attention to detail, you’re bound to end up with professional-looking results.
If you need an orbital sander for a car rust repair job or require any other otomobil aletleri, consider contacting MaxXT. MaxXT is a wholesale producer and distributor of auto tools and wall construction power tools. We provide top-quality, dependable power tools that our customers trust to tackle a wide range of projects.
Contact us today to discover how MaxXT power tools can simplify your DIY projects.