Önemli Noktalar:
- Wet sanding uses a damp sponge instead of sandpaper, eliminating airborne dust completely.
- This technique is ideal for small repairs, tight corners, and occupied homes.
- Joint compound must dry for at least 24 hours before wet sanding.
- Choose wet sanding for dust control on small areas; choose dry sanding for speed on large surfaces.
- Use a professional-grade wet sanding sponge (120-150 grit equivalent) for best results.
What This Article Covers:
This guide explains how to wet sand drywall step by step, compares wet vs. dry sanding methods, and covers ideal drying times for joint compound. It helps contractors and DIY homeowners achieve smooth,dust-free finishes on drywall repairs.
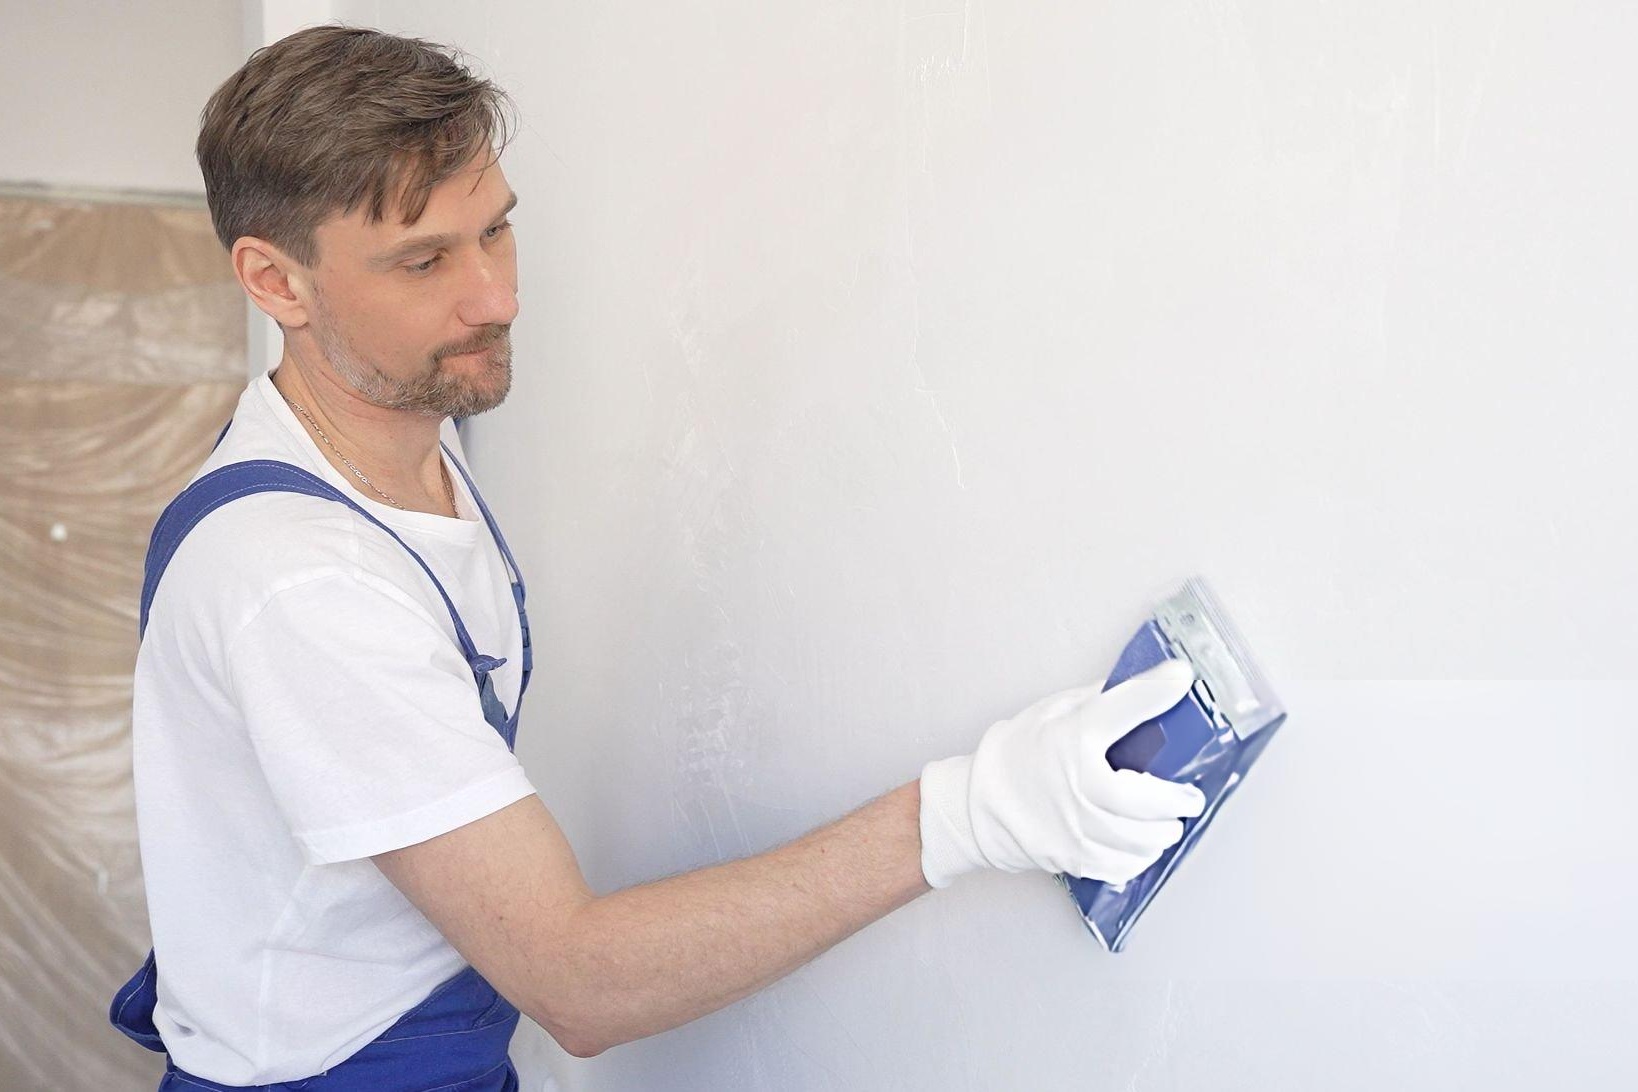
What Is Wet Sanding Drywall and How Does It Work?
Wet sanding drywall is a finishing method that uses a damp sponge to smooth dried joint compound. This process eliminates the clouds of airborne dust typical of traditional sanding. It works by slightly rehydrating the very top layer of the joint compound.
The water softens the high spots without grinding them into fine, floating particles. This allows you to gradually smooth the surface without generating airborne dust.
What Is Drywall Mud?
Drywall mud is a gypsum-based paste used to seal joints and cover fasteners. According to USG Sheetrock technical documentation, joint compounds vary by chemical composition vary by chemical composition. Most projects use drying-type compounds that harden as water evaporates into the air.
Setting-type compounds cure through a chemical process and not simply through the loss of moisture. It is important to know the difference between curing and drying. Curing refers to the chemical hardening process within the compound. Drying simply means the water has left the mixture entirely.
How Wet Sanding Differs From Traditional Sanding
Traditional sanding relies on mechanical abrasion to level a wall surface. This dry process creates massive amounts of fine gypsum dust. In contrast, wet sanding drywall joint compound uses surface rehydration and feathering.
The damp sponge gently dissolves the mud to blend it with the wall. Because the particles stay heavy and wet, they never become airborne. Instead of grinding the compound into dust, wet sanding softens and wipes away small imperfections.
Is Wet Sanding Better for Drywall?
Wet sanding drywall is better for dust control and small, confined areas. However, the process is significantly slower for large-scale finishing projects. If you are sanding a full room, dry sanding can be faster.
Choosing between wet and dry sanding involves balancing speed, dust control, and surface precision. Dry sanding produces the ideally flat foundation needed for high-gloss paint finishes.
This cleaner method provides a smooth transition for standard interior wall paints. Professionals often choose the technique based on the final paint sheen. Both options offer specific advantages depending on your desired level of detail.
Wet Sand vs Dry Sand Drywall
| Factor | Wet Sanding Drywall | Kuru Zımparalama |
| Dust Production | Minimal | Yüksek |
| Hız | Slower | Faster |
| Surface Precision | Ilıman | Yüksek |
| En İyisi İçin | Small repairs and corners | Geniş yüzeyler |
| Equipment | Specialized Sponge | Sandpaper or pole sander |
Method Recommendation Framework
| Proje Türü | Recommended Method | Why |
| Small patch repair | Wet sanding | Extremely low dust production. |
| Entire wall or room | Dry sanding | Much faster leveling speed. |
| Occupied home | Wet sanding or dustless | Protects indoor air quality. |
| Professional finishing | Dry sanding + vacuum | Maximum surface precision. |
Pros and Cons of Wet Sanding Drywall
Wet sanding offers significant dust control advantages but sacrifices speed compared to dry sanding.
Avantajlar
- Significantly reduces airborne drywall dust, which helps protect indoor air quality.
- Requires minimal cleanup compared with traditional sanding.
- Ideal for homes that are already occupied because it keeps the surrounding areas cleaner.
Disadvantages
- The process is slower than traditional dry sanding.
- Moisture can soften drywall mud unevenly.
- Excess water can require additional drying time before priming or painting.
Being able to assess these trade-offs will also help you feel secure when choosing the finishing method to fit the size of your project and the results for your surfaces.
How Long Should Joint Compound Dry Before Wet Sanding?
At an average indoor temperature of 70°F (21°C) and 50% relative humidity, joint compound typically dries in about 24 hours before wet sanding.
However, when the humidity is more than 70%, it takes longer for the joint compound to dry. Wetting a compound while it is still soft will ruin your finish. The sponge will pull the mud right out of the joint. Always ensure the compound feels rock-hard to your touch before sanding.
How to Check if Drywall Mud Is Fully Dry
You can check the color and texture of the compound to determine whether it is fully dry. Wet mud will appear gray or off-white. Dry mud will appear bright across the surface.
Perform a fingernail test on the surface to check hardness. If the mud is cool or damp, then more time is needed. Drying charts are available from manufacturers like USG and National Gypsum. The EPA also provides ventilation guidelines to ensure proper drying conditions.
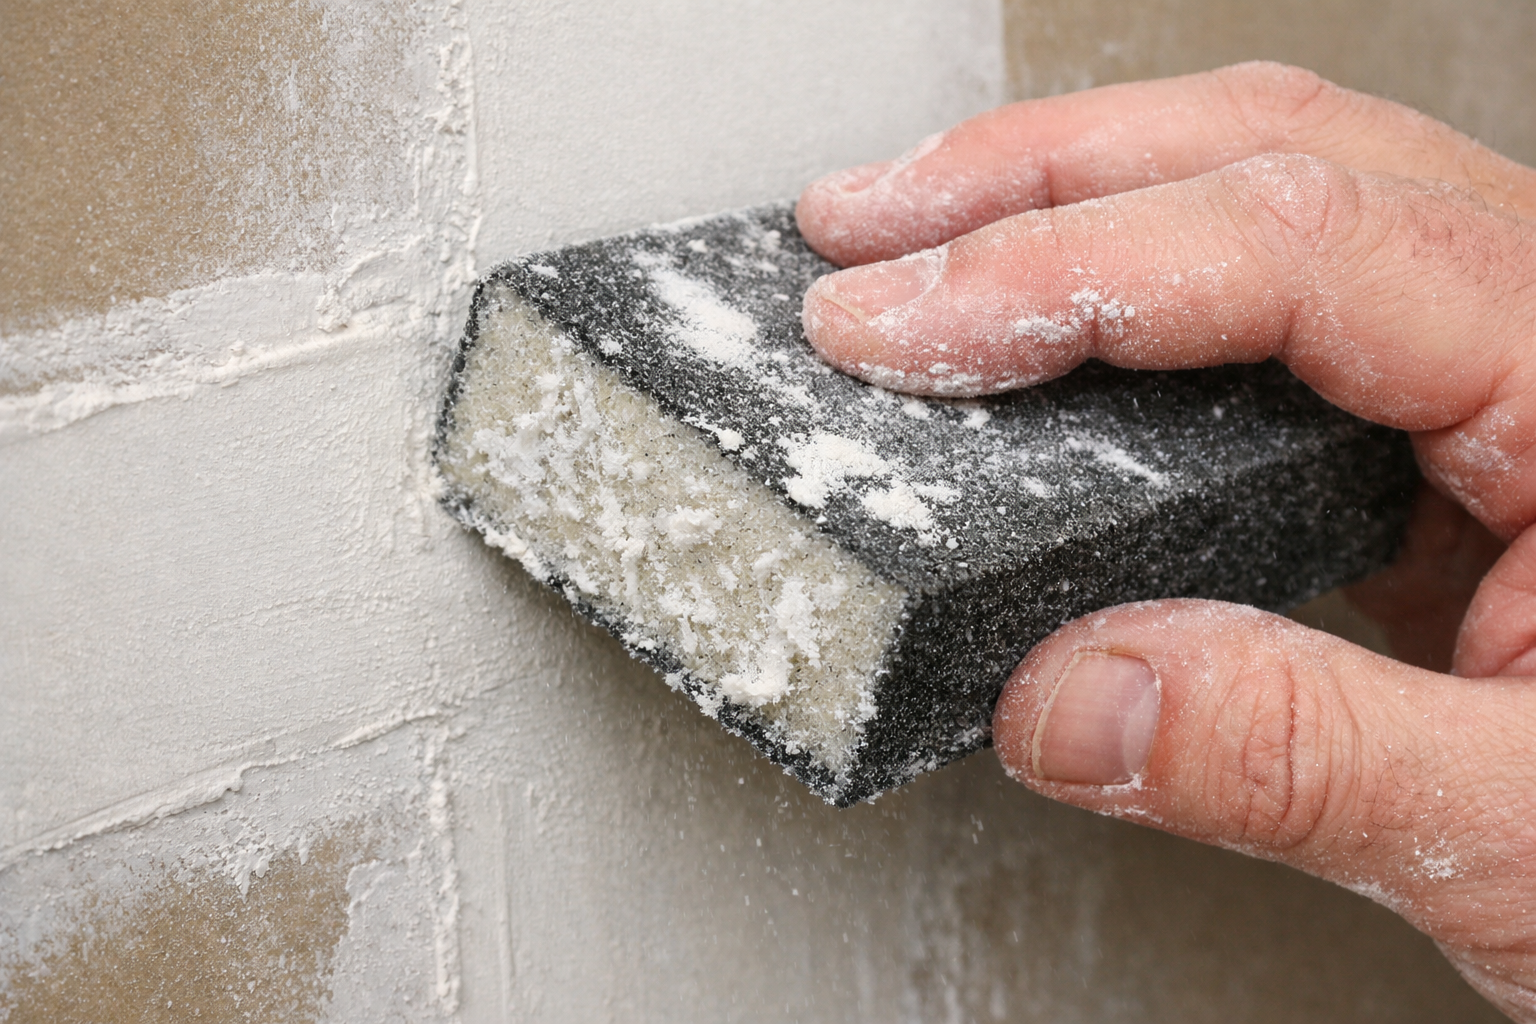
What Tools Do You Need for Wet Sanding Drywall?
The most effective tool for wet sanding drywall is a high-density wet sanding sponge. If you are sanding tight corners, select a finer grit sponge for better control.
For a drywall finish, expect to use a fine sponge that would compare to sandpaper of 120 to 150 grit. Using professional-grade tools like those from MaxXT Tech ensures consistent results. Quality depends on tool density, material durability, and a comfortable ergonomic grip.
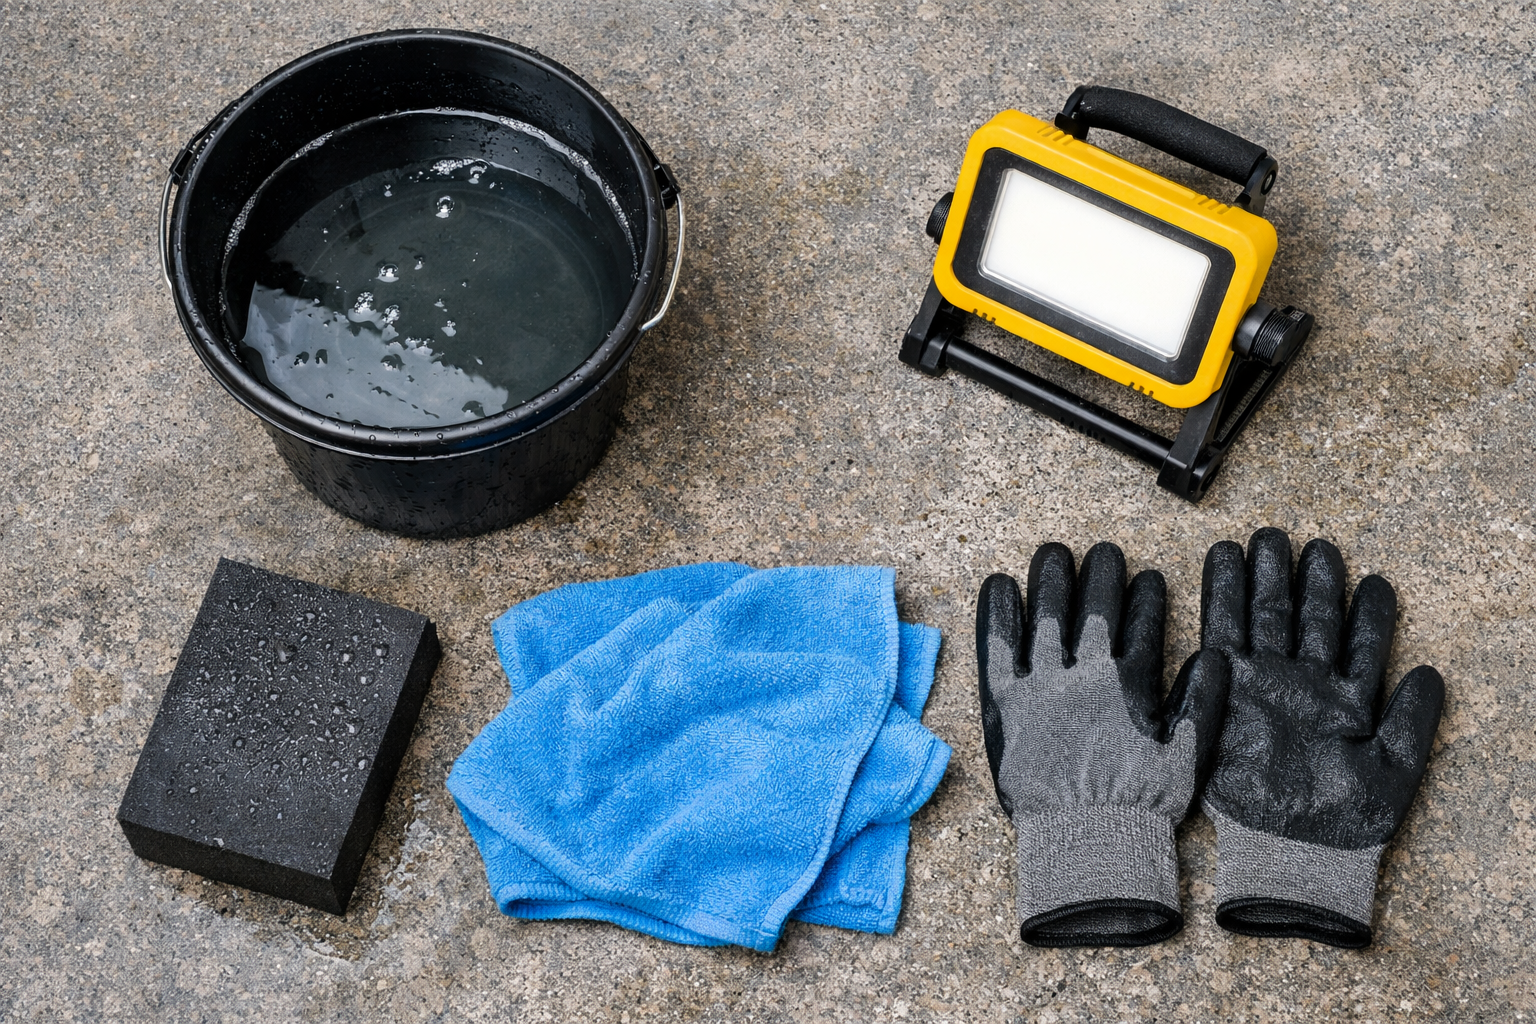
Essential Tools List
- Wet sanding sponge (fine or medium grit density).
- Clean bucket filled with room-temperature water.
- Microfiber cloth for wiping away any excess moisture.
- Work light to identify small surface imperfections.
- Protective gloves to keep your hands dry and clean.
Using professional tools ensures a great look without any mess. You can find high-performance options at the MaxXT sanding tools category page. We also offer specialized drywall finishing tools for every project. Our dust control tools help maintain a healthy working environment.
How to Wet Sand Drywall Step by Step
Follow these six steps to wet sand drywall: dry the compound, prepare the sponge, wipe in circular motions, rinse frequently, inspect with light, and allow to dry before priming.
Step 1: Allow Joint Compound to Fully Dry
Confirm the mud is dry by checking the color. It can be solid white without any dark spots. Touch the thickest areas to ensure they are firm.
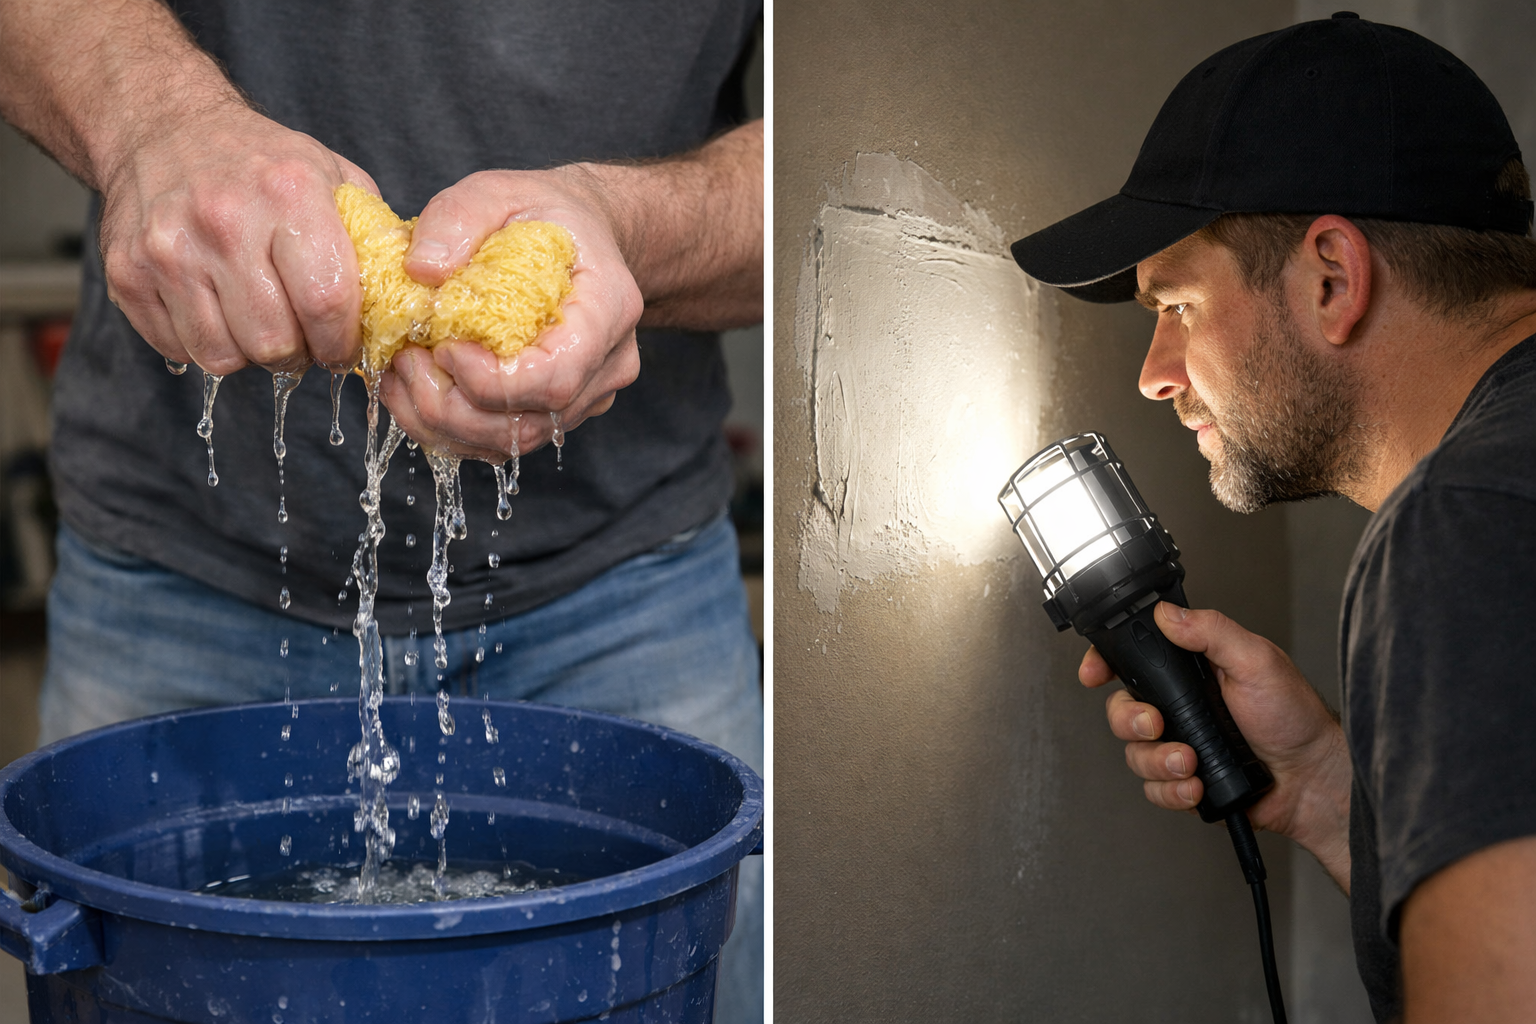
Step 2: Prepare Clean Water and Wring Sponge
Dip your sponge into the bucket of clean water. Wring it out thoroughly until it is only damp. Make sure it is not dripping water down the wall.
Step 3: Gently Wipe in Circular or Feathering Motion
Apply the sponge to the ridges of the compound. Use light, circular motions to knock down high points. Avoid applying excessive pressure to the wet surface.
Step 4: Rinse Sponge Frequently
The sponge will quickly fill with dissolved joint compound. Rinse it in the bucket often to keep pores open. This prevents you from simply smearing mud around.
Step 5: Inspect Surface With Angled Light
Hold a work light at a sharp angle to the wall. This reveals small ridges that need more work. Smooth these areas until all shadows disappear completely.
Step 6: Allow Surface to Dry Before Priming
Wet sanding adds moisture back into the joint material. You must wait 12–24 hours before applying any primer. Painting over damp mud will cause the finish to peel.
Safety and Air Quality Considerations
Wet sanding significantly improves indoor air quality by eliminating airborne gypsum dust. Controlling airborne particles improves indoor air quality and worker safety. Organizations like OSHA provide respirable dust guidance for all construction professionals.
The EPA offers resources regarding air quality during home renovations. NIOSH highlights the importance of reducing dust exposure in indoor spaces. Wet sanding is a primary way to meet these goals. It protects both the worker and the inhabitants of the home.
When Should You NOT Wet Sand Drywall?
Avoid wet-sanding sheetrock if the compound is not cured. It is also not suitable for aggressive leveling tasks. Water is not strong enough to remove major mud humps.
Conditional Scenarios
- Thick ridges: Use dry sanding first to remove bulk material.
- Setting-type compound: Avoid excessive water to prevent a gummy mess.
- High humidity: You must extend the drying time before starting.
- Exposed paper: Avoid oversaturating the area to prevent surface peeling.
- Gloss paint: Dry sanding ensures a much smoother, reflective finish.
Sıkça Sorulan Sorular
Can You Just Use Water for Wet Sanding?
For most projects involving wet sanding of drywall, plain water is perfectly fine. No special chemicals need to be added. Just be sure that your sponge is damp, not soaked, to avoid over-softening the compound. Keeping it simple is the name of the game.
How long should drywall mud dry before wet sanding?
Joint compound needs at least 24 hours to dry at 70°F and 50% humidity. Check that the compound is uniformly white and feels hard before sanding.
What grit sponge should I use for wet sanding drywall?
Use a fine-grit wet sanding sponge equivalent to 120-150 grit sandpaper. Finer grits provide better control for tight corners and small repairs.
What Are the Disadvantages of Wet Sanding?
It can soften the compound unevenly if you use too much water. It also requires a second drying phase before painting.
Do I need to prime after wet sanding drywall?
Yes. Wait 12-24 hours for the surface to dry completely, then apply aquality drywall primer before painting.
Final Inspection and Surface Preparation Before Painting
Wait 12-24 hours after wet sanding before priming to ensure the surface is completely dry. The primer seals the mud and the paper together effectively.
Inspect the surface one last time using an angled light. Remaining bumps will be pronounced as shadows. Ensure the finish is not just adequate, but perfect before the final coat. Professional results come from patience and close attention to detail.
Çözüm
Choosing between wet sand and dry sand for drywall depends on the goals. Wet sanding is one of the most effective methods for controlling dust during drywall finishing. Dry sanding remains the best choice for large installations.
Always ensure your joint compound is dry before you start. Use a quality wet sanding sponge for the best results. MaxXT Tech is a professional manufacturer and supplier of drywall tools.
We provide high-quality surface finishing solutions for many global clients. For bulk orders or technical consultation, contact our dedicated team. Contact us to discuss your project requirements today.