TL;DR
- For rapid removal, use oscillating multi-tools with triangular pads.
- Sand one side at a time to prevent tool edges from gouging adjacent surfaces.
- Identify ridges and hidden transitions before and after every pass using a low-angle raking light.
- Follow a three-stage grit progression — coarse for ridge removal, medium for blending, fine for finish-ready smoothness — to eliminate rework from skipped steps.
- Use vacuum dust extraction throughout every pass to maintain abrasive cutting speed, workspace visibility, and respiratory safety.
This guide is written for drywall finishers, furniture makers, auto body professionals, and serious DIYers who need to sand inside corners and tight angles faster without sacrificing surface quality. It covers tool selection, grit sequencing, feathering technique, material-specific methods, and a final inspection checklist — everything needed to cut rework and get surfaces paint-ready in fewer passes.
What Is the Best Tool for Sanding Corners and Edges?
The Raking Light: Your Diagnostic Starting Point
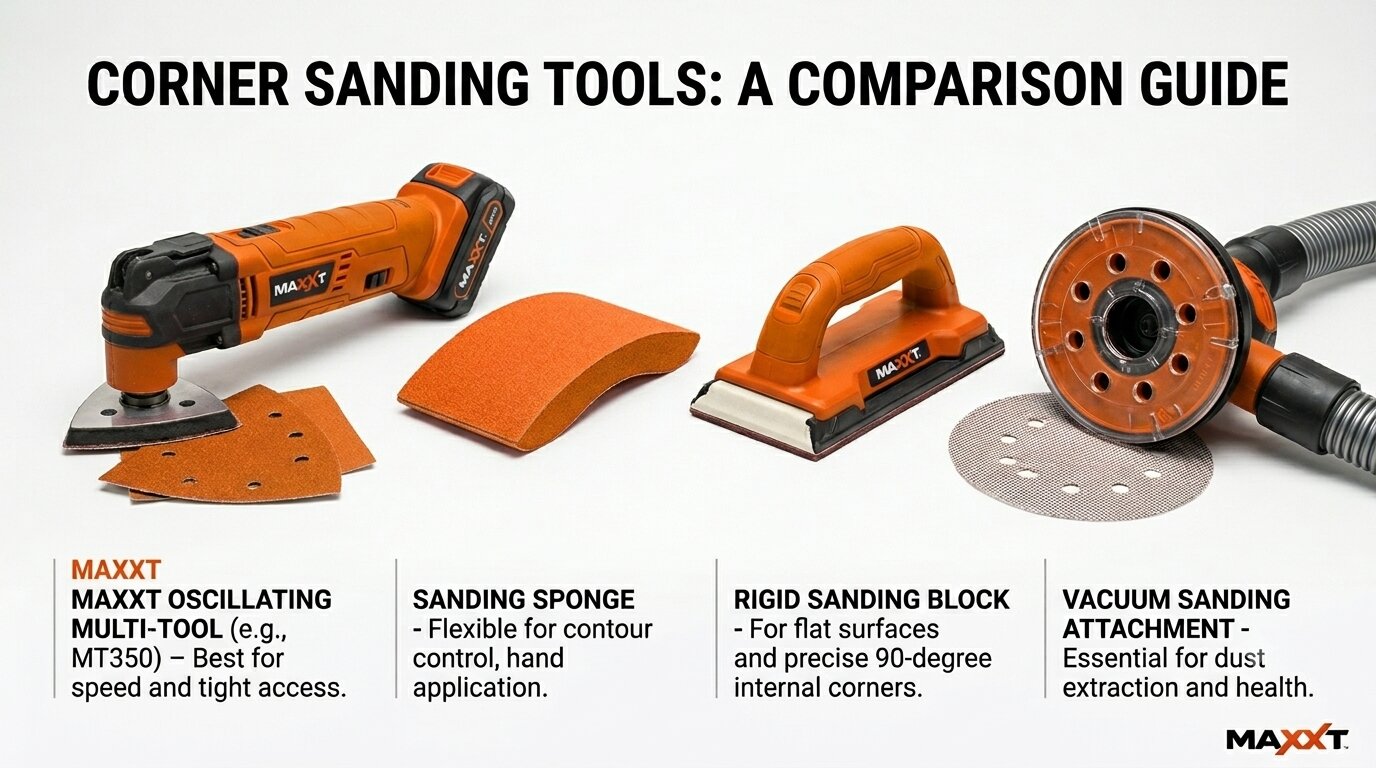
For maximum efficiency, oscillating multi-tools with triangular pads are the professional standard for corner sanding speed. Manual sponges are better reserved for final detail work where power tools would be too aggressive. The comparison table below breaks down when to use each option.
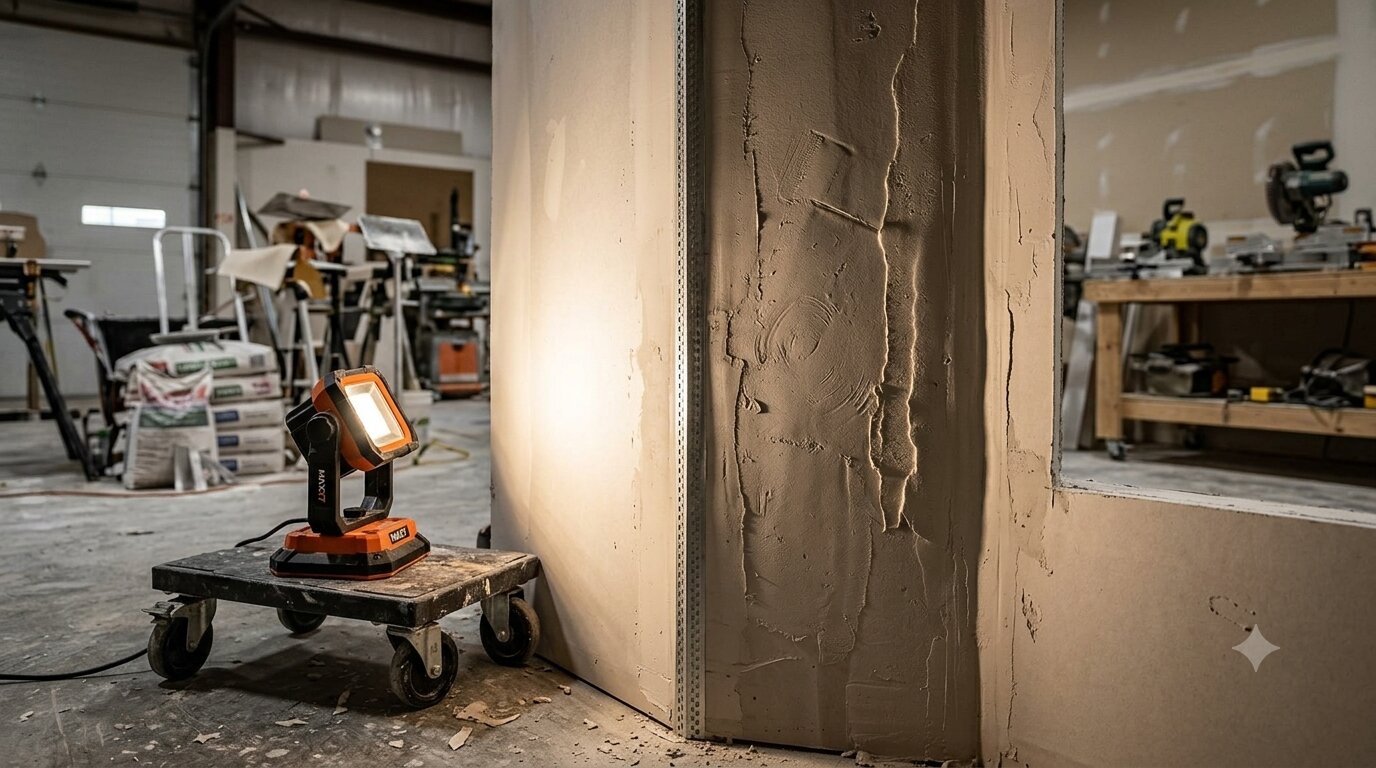
Before selecting any tool, accurately read the surface. Position a work light at a low, oblique angle to cast long shadows behind ridges, tool marks, and high spots that flat overhead lighting hides. This benchmark shows exactly where material needs removal and prevents over-sanding areas that are already flat.
Skipping this step is the single most common reason professionals waste time re-sanding — every tool and grit decision that follows depends on what this initial inspection reveals.
| نوع الأداة | الأفضل لـ | سرعة | جودة التشطيب | Dust Management |
| Hand Sanding / Sponges | Fine detail, furniture | قليل | عالي | Poor (unless wet) |
| أداة متعددة الاستخدامات متذبذبة | Rapid stock removal | عالي | Moderate–High | Good (with attachment) |
| Vacuum-Attached Sanders | Large drywall projects | Very High | عالي | Excellent |
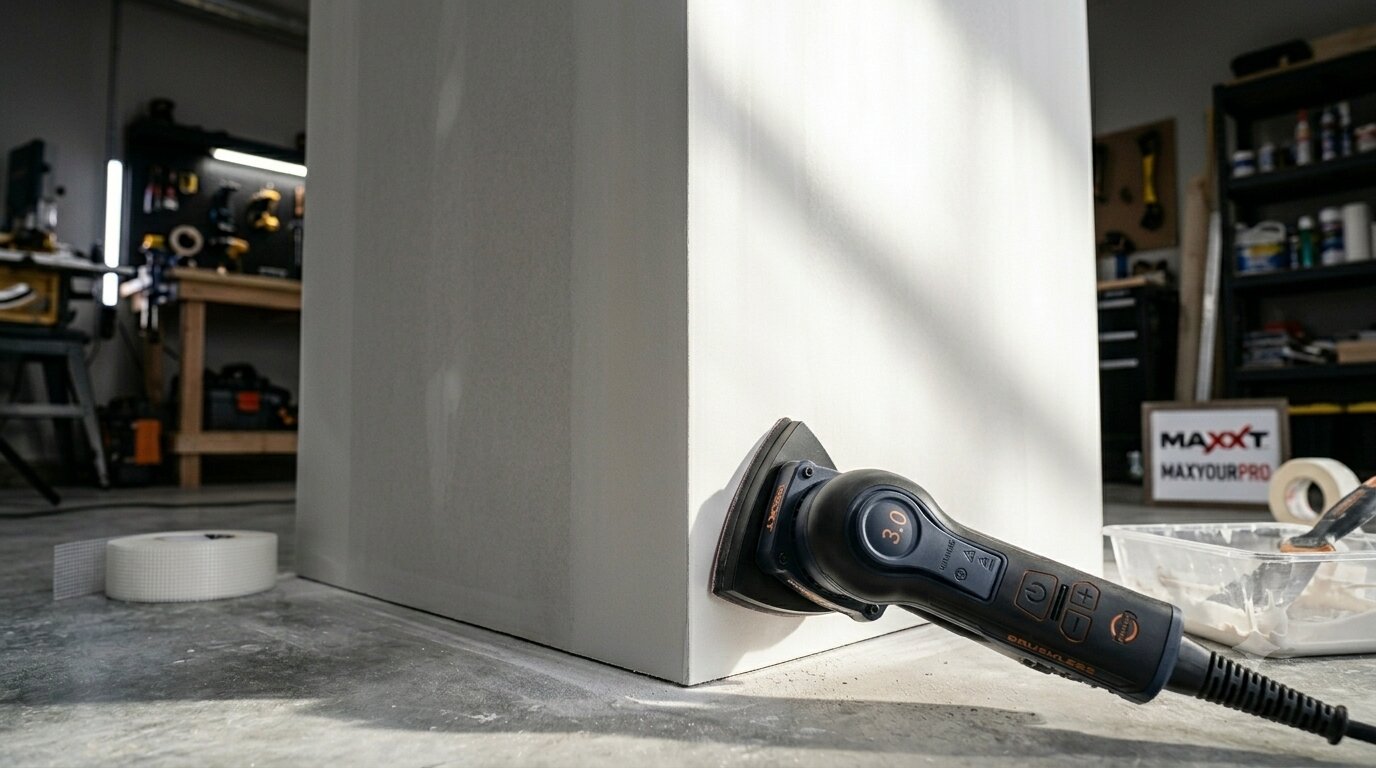
For fine furniture, you may use either a sanding block or an oscillating tool. Both keep the pad stable enough to hold a square edge.The triangular pad’s pointed tip is specifically designed to reach the absolute vertex of a 90-degree corner — without it, the vertex requires a separate manual pass that often produces a visibly different finish texture.
Should You Use a Corner Sanding Sponge vs. Sanding Block?
Sanding sponges give a little under pressure, which lets them follow minor dips and surface irregularities — handy when scuffing between paint coats. However, when architectural precision is the goal, a rigid block is superior. It stays perfectly flat, ensuring that inside angles and edges remain sharp rather than following the existing material texture.
What Is the Best Sandpaper Grit for Inside Corners?
The best starting grit for inside corners is 120–150 for drywall and 80–100 for wood or automotive primer, followed by at least two finer stages before finishing. Starting too fine glazes the surface without removing material. Starting too coarse damages corner bead or wood grain. The table below maps each stage to the correct grit range
Starting too fine glazes the surface without removing material. Starting too coarse damages corner bead or wood grain. A disciplined sequence ensures every prior scratch pattern is fully removed before finishing.
| Stage | Drywall Grit | Wood/Auto Grit | Goal |
| Initial Cut | 120–150 | 80–100 | Remove ridges/excess mud |
| Smoothing | 180–220 | 120–180 | Blend transitions |
| Final Finish | 240+ | 220–400 | Ready for primer/stain |
Grit designations follow ISO/FEPA standards (ISO 6344), which ensure consistent abrasive grading across manufacturers.
How Does a Dustless Corner Sanding System Improve Speed?
Dustless systems pull debris away from the work surface immediately using vacuum suction. Clean grit cuts faster and lasts longer. The side benefit is a workspace that doesn’t coat everything in fine dust.
How to Sand Corners and Inside Angles Without Gouging?
Many finishers struggle because they attempt to sand both sides of an angle at once. A better approach is the “feathering” method: apply firm pressure toward the center of the panel and lighten your touch as you glide toward the vertex. This prevents the tool’s edge from digging ruts into the joint.
How to Sand Tight Corners Using an Oscillating Tool?
Keep the pad flat against the surface at all times — tilting onto the point concentrates pressure and creates divots that paint will highlight. Move in short, controlled strokes toward the corner and avoid hovering in one spot, which causes uneven material removal and risks tearing softer surfaces like drywall mud.
How to Avoid Swirl Marks When Sanding Corners?
A vacuum attachment and a clean pad will handle most swirl problems before they start. Once you switch to hand-finishing, run your final strokes parallel to the corner line. This way, any micro-scratches follow the joint’s natural direction and disappear under the finish.
How to Sand Inside Corners in Different Materials?
Soft materials like drywall mud require a light touch to avoid tearing the paper tape underneath. Hard surfaces like epoxy primer or hardwood need more aggressive cutting to level effectively. Always match the tool speed and grit to the material’s specific resistance before beginning any pass.
Drywall Inside Corner Sanding Technique: How to Sand Wall Corners After Mudding?
Blend the outer mud edge into the drywall paper first, working outward from the corner. Only lightly scuff the vertex last to protect the joint tape. This sequence prevents ridges from forming at the transition point that would require additional mud coats and sanding passes to correct.
How to Sand Cabinet Corners and Door Frames Without Losing Detail?
Use a sanding stick for intricate areas to preserve molding profiles. For layered door frame profiles, treat each flat face individually rather than sanding across multiple angles at once, which rounds over the sharp transitions that define the piece.
How to Sand Car Body Corners and Seams for Paint Prep?
For paint prep, wet-sand between 400 and 600 grit — this keeps primer smooth without leaving scratches that show through a reflective base coat. Work wet the whole time, and wipe the surface down often to check your progress before moving up in grit.
How to Sand Epoxy Primer in Corners Faster?
Start with a fresh 120-grit on an oscillating tool, as epoxy is far harder than most coatings and kills pads more quickly. Swap to a fresh pad frequently, then finish the last pass by hand with a fine-grit sanding stick to achieve a clean, uniform surface.
Step-by-Step: How to Sand Inside Corners Faster
- Tool and Grit Selection: Pick your tool and opening grit based on the material — the progression table above covers this.
- One Side at a Time: Work the left face completely before touching the right, keeping the tool edge away from anything already finished.
- Feathering the Edges: Reduce the pressure near the vertex. A
- gradual fade makes the transition invisible at inspection.
- Final Inspection and Dust Removal: Vacuum every trace of dust. Then re-inspect under side lighting (see Step 1 raking light method) before moving up a grit or applying finish.
How to Tell If Your Corner Sanding Is Good Enough for Painting
- Side Lighting Re-Inspection: Reapply the raking light. Any remaining shadows or ridges mean more sanding is required before proceeding.
- Palm Touch Test: Run your palm across each face. Skin detects irregularities that eyes miss — if you feel a bump, paint will reveal it.
- Damp Cloth Wiping Test: Use a barely damp cloth to wipe the corner. It exposes scratches and dips that look fine when dry.
- Quantitative Standards: For cabinetry, follow AWI finishing standards — no scratches under a 100-watt bulb, and the joint should run as smooth as 220-grit paper from end to end.
Constraints: When Should You Avoid Power Sanding in Corners?
- Thin veneer: Burn-through risk is immediate. Hand-sand with a 220-grit sanding stick using light pressure parallel to the grain.
- Intricate historical moldings: Flat or triangular pads won’t cut it here — the profile is too complex. Instead, wrap sandpaper around a dowel or pencil that actually matches the molding’s shape and work it by hand.
- Lead-based paint: Don’t dry-sand this under any circumstances — the dust is a serious health risk. Wet-sand only, run a HEPA vacuum throughout, and follow إدارة السلامة والصحة المهنية lead-safe work practices from start to finish.
FAQ: Common Questions About Corner Sanding
How do you sand 90-degree inside corners fast?
Combine an أداة متعددة الاستخدامات متذبذبة with a triangular pad and a vacuum attachment. Sand one face at a time, checking progress under low-angle side lighting between passes.
Can you use an orbital sander in a corner?
No — a round pad cannot physically reach the vertex of an inside corner. The spinning disc often strikes the adjacent wall, leaving chatter marks or gouges that are difficult to blend out. Use a triangular-pad oscillating tool or hand-sand instead.
How do you prevent sanding through paint on corners?
Prevent paint breakthrough by switching to a higher grit and finishing strictly by hand near sharp edges. Power sanders concentrate excessive friction and pressure on the peak of a corner, where paint is naturally thinnest. Manual sanding provides the tactile feedback necessary to smooth the surface without exposing the substrate.
Conclusion and Professional Manufacturing Solutions
Top-notch corner sanding comes down to reading the surface honestly, picking the right tool, and running the same proven sequence every time. That discipline is what cuts rework out of the job and gets surfaces to paint-ready consistently.
MaxXT builds professional sanding equipment trusted by distributors worldwide to deliver that standard at scale. Explore our Dustless Sanding Solutions to bring industrial efficiency to your professional workflow today.